
Install Board and Batten Siding by Type
CertainTeed specifies fasteners every 12 inches in its described method, while ProVia specifies every 8 to 12 inches.
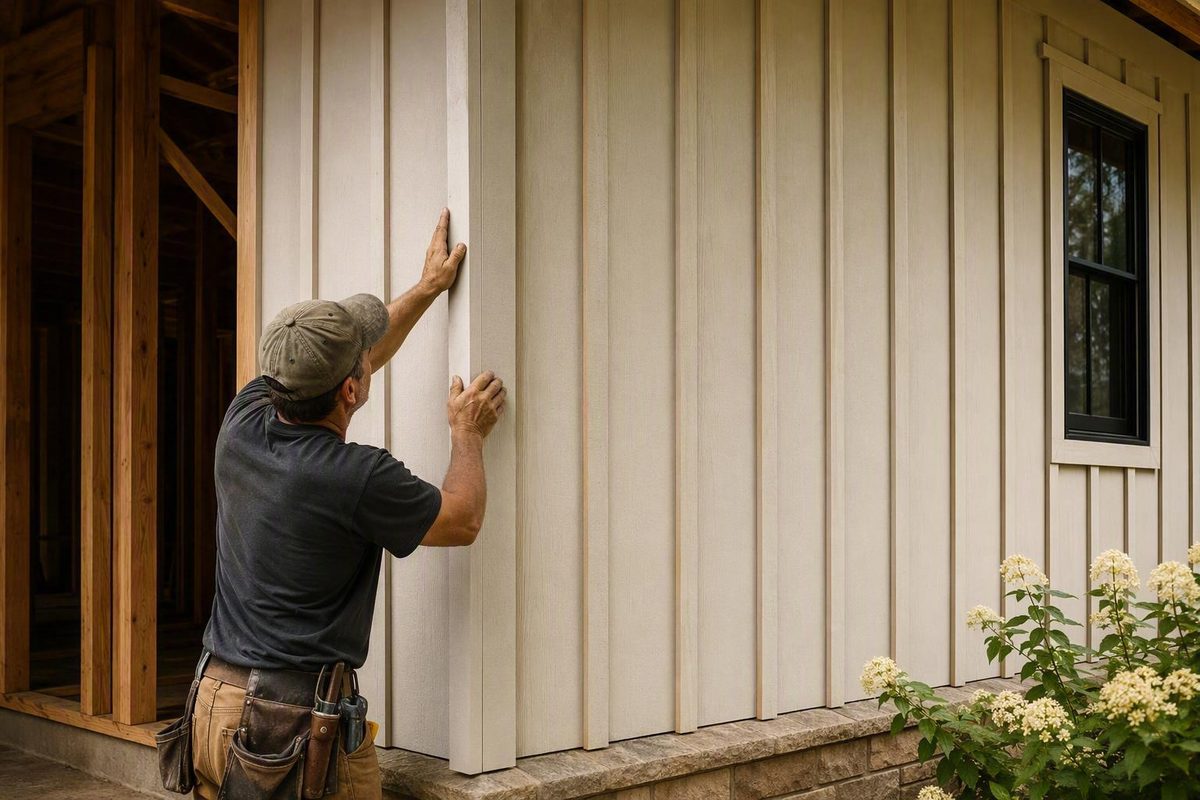
Board-and-batten is a visual style, not one universal construction method. Traditional wood siding uses separate vertical boards with narrower battens covering the joints. Vinyl products may use molded vertical panels with slotted nailing hems.
Although these systems can look similar after installation, they handle fastening, movement, drainage, cutting, and edge support differently. A reliable board batten siding installation therefore begins with identifying the exact product—not adopting a generic fastener schedule, expansion gap, or batten dimension.
This guide provides detailed, attributed pathways for traditional solid wood and two vertical-vinyl examples. For steel, engineered wood, fiber cement, and composite products, it provides a planning framework while leaving controlling specifications to the current first-party installation manual, warranty, construction documents, and local requirements.
First identify which board-and-batten system you have
Traditional board-and-batten siding consists of wide vertical wood boards with narrower battens covering the joints between them. Modern products can reproduce that appearance with vertical vinyl panels, panel siding plus applied battens, lap siding installed vertically, or interlocking panels with the board-and-batten profile formed into each piece.
Before buying fasteners or planning cuts, place the product into one of four categories:
- Separate solid boards and battens. Natural-wood boards are fastened vertically to approved horizontal support, followed by separate battens over the gaps.
- Vinyl panels with slotted nailing hems. The panel incorporates the board-and-batten appearance and must remain free to move as temperature changes.
- Sheet, panel, or vertical siding with applied battens. The broad siding surface is installed first, and separate trim creates the batten rhythm. Some engineered-wood and fiber-cement systems use this approach.
- Proprietary interlocking metal or composite panels. The profile, edge channels, joints, slots, fasteners, and accessories form a coordinated system.
Record the following before developing an installation plan:
- Manufacturer and exact product name
- Product profile and dimensions
- Installation-manual title, edition, and publication date
- Applicable warranty
- Wall substrate and any exterior insulation
- Required accessories and trim
- Approved fastener type, material, length, head style, and spacing
- Required clearances and movement allowances
- Local permit, inspection, wind, and code requirements
If the supplied webpage or document does not identify an edition or exact profile, confirm with the manufacturer that it applies to the product being installed. Do not assume that current online guidance covers older inventory or every profile sold under the same brand.
Instructions cannot be blended across categories—or even casually exchanged between products in the same category. Vinyl depends on slotted fastening and thermal movement. Solid wood changes dimension as its moisture content changes and can split if restrained by an unsuitable fastening pattern. A proprietary steel panel may depend on a particular edge channel and interlock that has no equivalent in a traditional wood wall.
Terminology can also mislead. A “batten” might be separate wood trim, a raised profile molded into vinyl, or an integrated part of a steel panel. A dimension describing the appearance of one system says nothing about another system’s structural attachment.
Readers still choosing a material can compare the broad differences among vinyl, wood, metal, fiber cement, and engineered-wood siding before selecting an installation method.
Pre-installation checks: wall condition, backing, water management, and code
Siding should not conceal an unresolved wall problem. Complete a preflight review before cutting the first board or panel.
Project preflight checklist
- Obtain the current installation manual and warranty for the exact product.
- Ask the local building department whether permits or inspections apply.
- Confirm whether local wind conditions change the required attachment.
- Determine whether the wall height, access conditions, material size, and available equipment are within the crew’s capabilities.
- Check the forecast and the manufacturer’s installation-temperature or weather restrictions.
- Store siding, trim, and accessories as directed by the product supplier.
- Locate framing, blocking, approved sheathing, or other permitted fastening points.
- Verify fastener material, head style, diameter or gauge, length, spacing, and required embedment.
- Confirm the approved wall assembly where exterior foam or nonstructural sheathing is present.
- Plan the sequence for the water-resistive barrier, flashing, trim, siding, and finish.
- Inventory corners, receiving channels, opening trim, transition pieces, and touch-up materials.
- Calculate wall-specific quantities and waste after planning the pattern.
CertainTeed’s vertical-vinyl instructions explicitly tell installers not to place vinyl over open furring strips or studs and to check with the local building-code official. ProVia’s instructions say high-wind regions may require different furring-strip spacing under local code. These statements support verifying jurisdictional requirements, but they do not establish one national attachment design. CertainTeed describes its substrate and code cautions in its vertical-siding instructions.
Inspect existing siding and any exposed sheathing while deficiencies can still be corrected. Stop work if you find rot, soft or failed sheathing, mold, pest damage, structural movement, unexplained staining, or uncertain flashing around openings. Repair the condition or obtain qualified evaluation before it disappears behind new cladding.
A recurring requirement across the cited systems is a sound, rigid, flat, level substrate with reliable fastening support. Flatness matters visually because vertical shadows emphasize waves.
Substrate requirements remain product-specific. CertainTeed calls for a smooth, level, rigid substrate and notes that additional solid nailing points may be needed along vertical panel edges. ProVia describes horizontal solid-wood furring or solid nailable sheathing for certain new-construction walls using rigid foam or fiber sheathing. It requires horizontal furring over existing siding to create a level surface, with the cited guide placing those strips every 8 to 12 inches on center and directing installers to verify different requirements in high-wind regions. ProVia’s vertical-vinyl guide states its substrate, furring, and high-wind qualifications.
These are named examples, not interchangeable wall designs. Do not use CertainTeed’s backing instructions for a ProVia, steel, composite, or wood assembly unless the controlling documentation independently requires the same detail.
Must the old siding come off?
There is no material-independent answer. TruLog’s instructions for its proprietary steel panels direct installers to remove existing siding and inspect the sheathing. ProVia’s vertical-vinyl instructions permit installation over existing siding when horizontal furring is added to create a level surface.
Removal exposes sheathing and opening details but adds labor, disposal, and the possibility of discovering repairs.
Decide before ordering trim. The selected product instructions, substrate condition, approved attachment, wall flatness, opening geometry, and local requirements must control.
Put water management ahead of the visible siding
Plan the water-resistive barrier, flashing, drainage path, openings, penetrations, corners, roof intersections, and top and bottom terminations before siding reaches them. Siding is one layer in the exterior wall; it does not replace the weather-management assembly behind it.
The available evidence does not support one universal sequence for WRB laps, window flashing, rainscreens, insect screening, exterior-insulation transitions, or penetrations. It also does not establish universal clearances above grade, roofs, decks, paving, or other horizontal surfaces.
Where systems intersect, consult every applicable document:
- Siding installation manual
- Siding warranty
- WRB instructions
- Window or door instructions
- Flashing-product requirements
- Construction drawings and specifications
- Applicable local code and approved permit documents
If two documents appear to conflict, obtain a written resolution from the manufacturer, project designer, or local authority rather than improvising. Product-specific instructions and applicable code take precedence over generic examples in this article.
Plan a centered, plumb layout before installing the first piece
The first board or panel controls the pieces that follow.
Complete a separate layout for every elevation. Wall widths, openings, corners, gables, porches, and adjoining elevations can require different edge cuts even when the intended batten rhythm remains consistent.
A practical layout worksheet
For each wall:
- Measure the usable width. Measure between the finished receiving points, accounting for installed corner posts, channels, or trim.
- Mark the wall centerline. Transfer it vertically with a laser or long level.
- Record the actual module. For manufactured panels, use the exposed width after engagement—not simply the nominal package width. For separate wood, record the intended board width, gap, and batten rhythm.
- Model a centered seam. Place a seam or board gap at the centerline and calculate the resulting cuts at both ends.
- Model a centered piece. Center one full panel or board and recalculate both edge cuts.
- Compare the options. Choose the arrangement that provides balanced, workable edge pieces.
- Map openings and trim. Check how battens relate to window centers, door jambs, penetrations, corners, and other visible elements.
- Mark control lines. Establish several known seams, panel edges, or batten centers across the wall.
- Save the elevation plan. Record the starting side, centerline treatment, end cuts, opening relationships, and special pieces.
Aesthetic spacing and structural fastening are separate. Moving an applied batten for visual balance does not authorize moving required fasteners or missing approved backing. Likewise, a batten dimension recommended for one product or appearance is not a universal structural requirement.
LP’s high-level discussion recommends planning the pattern before installation because the initial siding piece affects everything after it. It identifies panel siding, vertical siding, and vertically oriented lap siding as possible ways to create the look, while directing installers to separate product instructions for technical requirements. LP’s planning guidance discusses centering and visual alignment.
Transfer the selected layout with durable reference marks. Establish a true vertical control line rather than assuming a corner, window jamb, framing member, or sheathing edge is plumb. Check the first piece before fully fastening it, then check the next several pieces repeatedly. A small error across two panels can become obvious across an entire elevation.
Where feasible, make opposite end cuts equal or visually balanced. Also check continuity between walls. A rhythm that looks correct on one elevation can appear misaligned where it turns a corner or meets a porch, dormer, or projecting section.
For a gable, either center the layout beneath the peak and work outward or calculate a symmetric pattern before installing from one side. Do not assume the framing peak, sheathing seam, and visible finished centerline coincide.
Vertical vinyl board-and-batten installation workflow
Every measurement below is an example from a named vertical-vinyl guide. It is not a specification for all vinyl siding. Confirm that the cited instructions match the exact profile and product being installed.
1. Prepare the approved substrate
Begin with the manufacturer’s rigid-substrate or horizontal-furring requirements. Verify that panel edges and accessories have approved solid fastening points. Do not infer that any convenient sheathing, open framing, or furring arrangement is acceptable.
Establish the baseline exactly as the selected product diagram requires. CertainTeed’s supplied webpage places its baseline 1 inch above the wall’s low point. ProVia’s supplied instructions place a level chalk line 1 inch below the substrate’s lowest point. The difference illustrates why instructions cannot be combined.
Install the specified corners and receiving accessories in the required order. Keep them plumb and preserve movement where the product instructions require it.
2. Use the specified starter and receiving assembly
CertainTeed says not to use a conventional starter strip in its described vertical-siding method. Instead, its method places J-channel along the top and bottom to receive the panels. ProVia describes J-channel and/or flashing along its baseline as a starter course. Similar vocabulary does not make the assemblies identical.
In CertainTeed’s example, the bottom J-channel receives drainage holes every 2 feet. Adjoining J-channel lengths overlap by 3/4 inch, and a 1/4-inch gap is left between J-channel and corner posts in the cited applications. Those dimensions belong to CertainTeed’s described method and must not be transferred automatically to another brand. CertainTeed provides the cited baseline, J-channel, drainage, overlap, and corner-gap dimensions.
Install required flashing and drainage components in the specified sequence. Do not obstruct designated drainage exits with sealant, trim, or debris.
3. Cut for product-specified movement
CertainTeed says that, in most cases, the upper J-channel should allow 1/4 inch for upper expansion and 3/8 inch for lower expansion Installing Vertical Siding. ProVia says to add 1/8 inch to each stated cutback when the installation temperature is below 40°F. Its instructions also warn that panels and accessories must remain free to move. ProVia supplies these temperature and movement-clearance examples.
Measure the actual receiving space and deduct the applicable top and bottom cutbacks. Do not cut every panel from an assumed wall height. Baselines, soffits, channels, and rooflines can vary. Take representative measurements across the elevation, especially beneath eaves and in gables.
Providing clearance alone is not enough. If fasteners clamp a slotted component against the wall, the component may still be unable to move.
4. Fasten through slots without clamping the siding
For both cited vertical-vinyl examples:
- Place the first fastener at the upper end of the uppermost full slot.
- Center subsequent fasteners in their slots.
- Drive fasteners straight.
- Do not tighten them enough to prevent movement.
- Use the fastener type, length, and substrate penetration required for the selected product.
Spacing differs by guide. CertainTeed specifies fasteners every 12 inches in its described method, while ProVia specifies every 8 to 12 inches. These are product-attributed examples, not a general vinyl schedule.
Do not add an unapproved face fastener to compensate for poor alignment or unsupported edges.
5. Keep every panel plumb and fully engaged
Position the first panel against the specified corner or receiving accessory, engage its lock as directed, and check it with a level. Recheck after placing the first fasteners because fastening can shift a loosely positioned panel.
Engage each subsequent panel completely without stretching or forcing it. Compare the apparent batten interval with the layout marks, then check plumb again. If alignment begins to drift, correct it immediately rather than hiding the error at the far corner.
6. Support cut edges correctly
A ripped panel may lose the locking or supporting edge that normally retains it. Do not leave the edge floating, improvise a face-fastening detail, or assume trim alone will hold it.
CertainTeed’s cited example uses furring, undersill trim, and snap-lock tabs spaced 6 inches apart to support certain cut edges. That is one approved detail for the described system, not a universal repair for every vinyl product.
7. Treat special conditions as separate designs
Pause and consult the exact product instructions for:
- High-wind attachment
- Cold-weather cutbacks
- Continuous rigid foam
- Nonstructural sheathing
- Walls requiring more than one vertical course
- Unusual wall heights
- Gables and roof intersections
- Mixed-cladding transitions
CertainTeed’s supplied guidance includes special high-wind fastener positioning and several accessory arrangements for walls requiring additional courses. ProVia’s supplied guide requires a second course on walls over 120 inches and describes a transition using back-to-back J-channels with flashing. These are product-specific details and should not be reconstructed from a summary.
Traditional solid-wood boards and battens
Traditional wood siding uses separate vertical boards attached to horizontal blocking, stringers, or approved furring. Narrower battens then cover the gaps between adjacent boards. The apparent simplicity conceals a central technical issue: wood changes dimension as its moisture content changes.
There is no universal board width, batten width, gap, or fastening pattern. Species, grade, moisture condition, board dimensions, backing, exposure, finish, climate, and governing instructions all affect the appropriate assembly.
Establish backing and board rhythm
Confirm that the horizontal support is sized, spaced, and attached for the selected siding and applicable design loads. Mark each bearing line so board and batten fasteners enter the intended support.
Plan the pattern before installation. Gaps must remain consistent enough for battens to cover both neighboring edges, but appearance is not the only concern.
Install the first board plumb. Check every succeeding board rather than using the preceding edge as the only reference. Tapered boards and small variations in gap width can otherwise shift the pattern across the wall.
Batten width and overlap
Battens must cover the open joint while maintaining adequate bearing over both neighboring boards. Wider boards generally require greater allowance for movement.
As a cedar example, Bear Creek Lumber states that nominal 6-inch boards spaced 1/2 inch apart should receive at least 1/2 inch of batten overlap over each board edge. It calls for proportionally greater overlap on wider boards and states that board and batten widths are not fixed. Bear Creek Lumber provides the cited cedar spacing and overlap example.
That example does not create a universal 1/2-inch gap or overlap requirement. It demonstrates the calculation: the batten must cover the open joint plus the required overlap on both sides, with sufficient coverage remaining as the boards move.
A dry-wood fastening example
Bear Creek Lumber’s cedar guidance provides the following fastening pattern:
- Boards up to 6 inches wide receive one centered nail at each bearing.
- Boards 8 inches and wider receive two nails per bearing, approximately 3 inches apart.
- Each batten receives one nail per bearing.
- The batten-nail shank passes between the edges of the underlying boards.
Passing the batten fastener through the gap avoids pinning both underlying board edges together. The dimensions and nail arrangement remain a supplier example, not a substitute for instructions covering the selected species, moisture condition, backing, exposure, and fastener material. Bear Creek Lumber describes this board-width and bearing-based fastening example.
Green lumber requires a different approach
Freshly milled or unseasoned boards can shrink as they dry, so a green-lumber method should not be combined with a dry-siding fastening pattern.
In Dave Boyt’s green-lumber practice, horizontal stringers are placed no more than 4 feet apart. Each board receives one fastener near an edge so the other side can move while drying. The batten fastener later passes through the gap into the stringer rather than pinning the board edges. Boyt also describes waiting about six months before centering and fastening battens over the gaps that develop. Dave Boyt’s Hobby Farms article documents this project-specific green-lumber method.
Neither the 4-foot spacing nor the six-month delay is a general residential standard. They are one author’s practice for freshly milled lumber. Dry cedar, kiln-dried siding, and proprietary wood products may require different backing, gaps, fastening, and installation timing.
Do not average the dry and green methods into a hybrid. Confirm:
- Wood species and grade
- Actual moisture condition at installation
- Board width and thickness
- Expected dimensional movement
- Required backing and bearing locations
- Fastener type and corrosion resistance
- Number and position of fasteners
- Finish requirements for faces, backs, edges, and ends
- Treatment of field cuts
- Required clearances and ventilation
Questions about back-priming, field-cut sealing, coating schedules, corrosion-resistant fasteners, and clearances must be resolved through the siding supplier, coating manufacturer, construction documents, and applicable code. Check every board for plumb and verify that each batten continues to cover both neighboring edges adequately.
Metal, engineered-wood, fiber-cement, and composite systems
Manufactured board-and-batten products require a manufacturer-first pathway. Profiles, panel dimensions, joints, accessories, fastening schedules, clearances, cutting methods, finish requirements, and warranty conditions can differ even within one material category.
For an applied-batten system, the broad organizational sequence may be:
- Plan the layout.
- Prepare the specified substrate and weather-management assembly.
- Install the panel or vertical siding plumb and straight.
- Install evenly spaced battens where the approved system uses applied trim.
- Complete required sealing, coating, touch-up, and inspection work.
That sequence does not supply technical specifications. It does not establish fastener spacing, joint treatment, edge clearances, flashing, batten attachment, or coating requirements.
Proprietary steel panels
TruLog illustrates how an integrated panel differs from traditional wood. Its steel system uses 9-inch-wide panels with the board-and-batten profile formed into each piece. Panels enter specified edge channels, fasten through slotted nailing strips, and interlock sequentially.
For that proprietary system, TruLog tells installers to center screws in the slots, avoid overtightening, verify that each panel completely engages the previous one, and check every panel for plumb. The next panel conceals the preceding fastening edge. These directions apply to the cited TruLog profile and do not establish attachment or cutting requirements for other steel products. TruLog describes its 9-inch panel, channel, slot, and interlocking method.
Safety planning must also follow the actual product and tools. TruLog advises wearing gloves and safety glasses and identifies metal snips and ferrous-blade saws among the tools used for its panels. Use the selected product’s instructions and the cutting-tool manufacturer’s requirements rather than treating those precautions as a complete safety specification. TruLog provides the cited steel-cutting tool and protective-equipment guidance.
Engineered wood, fiber cement, and composite products
The available evidence does not support a complete technical tutorial for these categories. Obtain the current first-party guide before determining:
- Whether panels or individual vertical pieces are permitted
- Required framing or sheathing
- Panel orientation and joint treatment
- Fastener type, placement, spacing, and embedment
- Batten attachment
- Edge and end clearances
- Flashing and drainage details
- Field-cut treatment
- Required coatings or touch-up
- Dust-control and cutting procedures
- Warranty-related installer qualifications
Everlast publishes a resource page linking to a downloadable board-and-batten installation PDF, but the supplied landing page does not expose the PDF’s technical requirements. Review the current PDF and warranty before installing that product. Everlast’s resource page identifies its downloadable installation guide.
A Love & Specs DIY project used ACX plywood sheets with decorative battens on a small detached backyard office. That account does not prove that exposed ACX plywood and battens form a generally approved, durable, or code-compliant exterior wall system. Product suitability must be established through authoritative documentation for the intended building and climate.
The same project recommends respiratory protection while cutting its cement-based trim because the cutting process produced airborne particulate. That is a project-specific safety statement, not a universal exposure-control specification for every cement-based product; follow the selected product’s safety information and tool requirements. The Love & Specs project provides the cited respirator recommendation.
Openings, gables, tall walls, and final quality checks
Windows, doors, corners, penetrations, wall tops and bottoms, roof intersections, and course transitions must be incorporated into the WRB, flashing, trim, and drainage plan before siding reaches them.
Do not select flashing dimensions from an unrelated tutorial. At every intersection, reconcile the instructions for the siding, window or door, WRB, flashing product, and trim system. A neat exterior bead of sealant does not demonstrate that concealed flashing drains correctly.
Gables and tall walls
For the cited vertical-vinyl systems, a gable layout may be centered beneath the peak and worked outward. Alternatively, calculate a symmetric layout and begin from one side. Make a cutting template only after confirming the geometry of the roofline and receiving channels.
Tall vinyl walls may require a second course with product-specified receiving channels and flashing. Do not simply butt one panel above another or cover an unsupported joint with generic trim. A course transition must preserve drainage, movement, edge support, and visual alignment.
Inspection hold points
Inspect and photograph the work at these stages:
- After demolition and substrate repair: Confirm that damaged sheathing, framing, pests, and moisture sources have been addressed.
- After WRB and flashing: Record opening details, penetrations, transitions, and drainage paths before covering them.
- After layout: Confirm centerlines, edge cuts, opening relationships, and gable symmetry.
- After the first several pieces: Check plumb, engagement, fastener placement, movement, and visual rhythm.
- At each opening: Verify cut-edge support, flashing integration, trim, and drainage.
- At every course or material transition: Confirm the approved accessory and flashing detail.
- Before final trim: Make sure concealed locks and fasteners remain accessible for correction.
- At completion: Review alignment, finish, touch-up, drainage exits, and cleanup.
Troubleshooting common symptoms
| Symptom | Issue to investigate | Appropriate response |
|---|---|---|
| Buckled or distorted vinyl | Fasteners may be too tight, slots may be pinned, or specified clearance may be insufficient | Stop and compare the affected area with the product’s movement and fastening instructions |
| Split wood boards | Fastening pattern, board moisture, width, pilot-hole needs, or movement allowance may be unsuitable | Identify the wood condition and governing fastening method before replacing pieces |
| Wavy panels | The substrate may be uneven, or panels may have been forced into alignment | Correct the backing problem rather than relying on trim to conceal it |
| Loose or unsupported cut edge | Cutting may have removed the normal locking support | Install the manufacturer-approved edge-support detail |
| Battens drifting across the wall | Small layout or plumb errors may have accumulated | Return to the control lines and correct the pattern before continuing |
| Steel panel not fully engaged | The interlock may be obstructed, misaligned, or incomplete | Release or remove the piece as permitted and correct it before installing the next panel |
| Water trapped at bottom trim | A drainage exit may be blocked, or the termination may be incorrect | Stop and verify the specified drainage and flashing assembly |
| Unequal corner cuts | The layout may not be balanced, or usable width may have been measured incorrectly | Recalculate before proceeding to adjoining elevations |
Final quality checklist
Confirm that:
- Boards and panels are plumb.
- Opposite edge pieces are balanced where feasible.
- Visual batten spacing is consistent.
- Cut edges have approved support.
- Interlocking panels are completely engaged.
- Slotted fasteners are positioned correctly and are not overdriven.
- Wood fastening matches the selected moisture and width conditions.
- Corners, openings, and transitions use specified accessories.
- Drainage exits remain continuous and unobstructed.
- Trim is secure without improperly restraining movable components.
- Required field-cut treatment, finish, caulk, or touch-up is complete.
- Metal fragments, nails, offcuts, and cutting debris have been removed.
- Photographs and product records are stored with the warranty documents.
A final visual inspection cannot prove that concealed WRB and flashing are correct. Photograph those details before covering them, preferably with enough context to identify their location and relationship to nearby openings or transitions.
DIY decision and realistic installation costs
Board-and-batten installation may be a reasonable DIY project for an experienced person working on a simple, accessible elevation with a well-documented product. It becomes less suitable when the work includes uncertain water intrusion, complex flashing, extensive repairs, high elevations, heavy materials, or an unfamiliar proprietary system.
DIY readiness test
Before proceeding, answer these questions honestly:
- Can you integrate exterior flashing at windows, doors, penetrations, and roof intersections?
- Can you recognize rot, failed sheathing, structural movement, mold, and pest damage?
- Can you manage the wall height and required access without improvising?
- Can you handle the product’s weight, dimensions, and cutting requirements?
- Do you understand the selected product’s cutting hazards and protective instructions?
- Do you have the specified cutting, fastening, layout, and access equipment?
- Can you locate or construct approved fastening points?
- Can you keep the first and subsequent pieces plumb?
- Can you follow the manual without substituting details from a familiar but different system?
- Have you verified permits, inspections, and wind-related requirements?
- Will you stop if concealed conditions differ from the plan?
- Can you document warranty-critical steps and concealed weather details?
- Can you protect an exposed wall if the work takes longer than expected?
Professional or specialist evaluation is prudent for multiple stories, extensive rot, failed sheathing, complex roof intersections, uncertain leaks, continuous exterior insulation, heavy or difficult-to-cut materials, and high-wind attachment. When unresolved water intrusion is the central problem, consider consulting an appropriately qualified building-envelope professional before treating siding replacement as the repair.
Calculate the correct area
Siding quantity is based on exterior wall faces, not interior floor area. Measure each elevation and gable, then follow the selected product’s rules for deducting openings. Add trim, corners, starter or receiving channels, transitions, pattern alignment, and a waste allowance based on actual panel lengths and planned cuts.
A house with many windows, doors, corners, dormers, or roof intersections can require more cutting and labor than a plain wall with the same net area. Gable offcuts may not be reusable if profile orientation, pattern alignment, or minimum piece sizes prevent it.
Treat national costs as dated illustrations
Fixr’s estimate, updated January 26, 2026, gives an installed range of $4 to $13 per square foot and a typical whole-project range of $7,500 to $23,000. Material, exterior wall area, design complexity, access, number of stories, location, and labor conditions can move a local quote outside those ranges. Fixr provides these dated national estimates and cost factors.
Homewyse provides a narrower modeled example rather than a whole-house benchmark. Its January 2026 scenario estimates $3,765.71 to $5,802.96 for 500 square feet on a one-level rectangular building using basic builder-grade material and medium-cost labor. The modeled material quantity is 534 square feet, including typical overage.
That example includes specified setup, preparation, installation labor, supplies, cleanup, trash removal, delivery, and service-provider transportation. It excludes removal and disposal of existing items, sales tax, permits and inspections, hazardous-material remediation, repairs or structural modifications, and general-contractor supervision. Homewyse states the scenario’s price, assumptions, inclusions, and exclusions.
Quote-comparison checklist
Ask every bidder to separate or clearly define:
- Existing-siding removal
- Disposal and dump charges
- Hazardous-material testing or remediation
- Sheathing and framing repair
- WRB replacement or repair
- Window, door, penetration, and roof-intersection flashing
- Rainscreen or furring, if required
- Exterior-foam attachment system
- Siding material and quantity
- Corners, channels, battens, and trim
- Fasteners and accessories
- Factory or field finish
- Field-cut sealing and touch-up
- Scaffolding, lifts, and access equipment
- Permits and inspections
- Cleanup and nail or metal-fragment collection
- Taxes and delivery
- General-contractor supervision
- Change-order rates for concealed damage
- Workmanship warranty
- Manufacturer-warranty responsibilities
- Documentation of concealed weather details
Compare scope before price. A low bid may assume that the existing siding and WRB remain, exclude repairs, or omit access equipment and disposal.
Siding Spot describes itself as an informational comparison publisher rather than a siding seller or installer. It also states that contractors do not pay for placement. Siding Spot’s About page explains its editorial and commercial role.
The following frequently asked questions summarize the product-specific distinctions that matter most.
Can board-and-batten siding be installed over existing siding?
Sometimes, but not universally. ProVia’s cited vertical-vinyl instructions permit installation over existing siding when horizontal furring creates a level surface. By contrast, TruLog’s cited steel-panel instructions direct installers to remove existing siding and inspect the sheathing.
The controlling factors include the exact product instructions, substrate condition, approved fastening support, wall flatness, opening and trim geometry, local requirements, and the ability to maintain a reliable weather-management assembly. Remove or investigate existing cladding when it conceals suspected damage or prevents attachment and flashing from being verified.
How far apart should board-and-batten fasteners be?
There is no universal spacing.
In the cited vertical-vinyl examples, CertainTeed specifies fasteners every 12 inches for its described method, while ProVia specifies every 8 to 12 inches. Traditional wood is generally fastened at approved horizontal bearings rather than according to a vinyl schedule. Bear Creek Lumber’s dry-wood example calls for one centered nail at each bearing on boards up to 6 inches wide and two nails per bearing, approximately 3 inches apart, on boards 8 inches and wider.
Green-lumber guidance can use a different edge-fastening method. Always follow the selected product’s fastener type, spacing, position, backing, and embedment requirements. Wind exposure and exterior insulation may require a separately verified attachment approach.
How much space should vinyl board-and-batten siding have for expansion?
The cited CertainTeed and ProVia examples use 1/4 inch at the top and 3/8 inch at the bottom. ProVia adds 1/8 inch to each stated cutback when installation temperatures are below 40°F.
These are product-attributed examples, not universal vinyl specifications. Panel length, installation temperature, accessories, wall configuration, and current manufacturer instructions determine the required clearance. Slotted components must also remain free to move; clearance will not compensate for fasteners that clamp the panel tightly.
How wide should wood battens be, and how much should they overlap the boards?
There is no fixed batten width. A batten must cover the gap while maintaining adequate overlap over both board edges as the wood moves.
In Bear Creek Lumber’s cedar example, nominal 6-inch boards spaced 1/2 inch apart require at least 1/2 inch of batten overlap over each board edge. Its guidance calls for proportionally greater overlap on wider boards. Species, moisture content, board width, intended gap, climate, and supplier instructions should determine the final dimensions.
How much does professional board-and-batten siding installation cost?
For January 2026, the cited national and modeled illustrations differ in scope. Fixr estimates $4 to $13 per square foot installed and a typical whole-project range of $7,500 to $23,000. Homewyse’s defined 500-square-foot scenario estimates $3,765.71 to $5,802.96 for a basic, one-level rectangular project under its stated assumptions. Fixr presents the national installed range and typical project range.
Neither figure is a local quote. Exterior wall area, material, stories, access, removal, sheathing repair, flashing, trim complexity, permits, disposal, taxes, supervision, and regional labor conditions can substantially change the price. Homewyse also excludes removal, taxes, permits and inspections, hazardous-material work, repairs or structural modifications, and general-contractor supervision from its cited model. Homewyse details the modeled total and exclusions.
The material-first action plan is straightforward: identify the exact system, obtain its current manual and warranty, resolve wall damage and water-management details, calculate a balanced layout, and install according to that system’s movement and fastening rules. Document concealed work before covering it. The best-looking board-and-batten wall depends less on a supposedly universal batten dimension than on a sound substrate, deliberate drainage, accurate layout, compatible fasteners, and strict adherence to product-specific requirements.