
How Should You Maintain Vinyl Siding?
Pressure washing has no one-size-fits-all setting: no generic PSI, nozzle, spray width or stand-off distance is supported for every siding system.
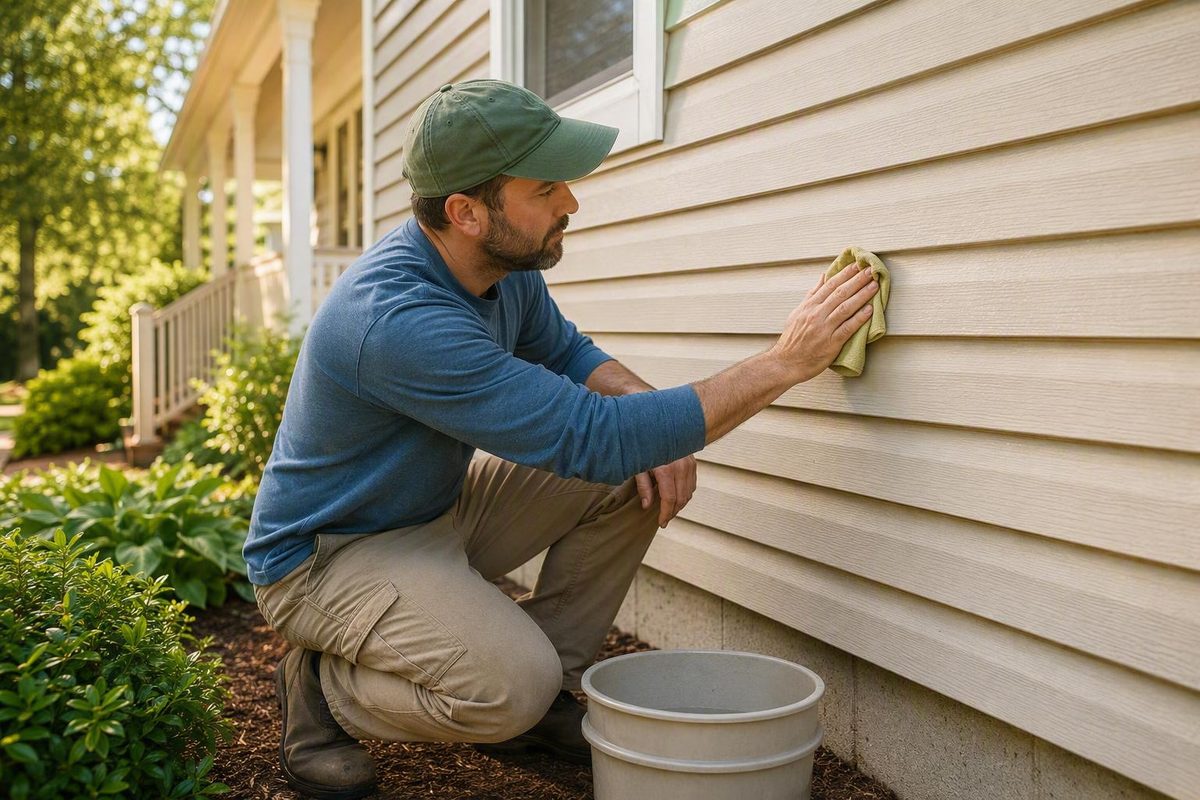
Vinyl siding maintenance is safest when treated as a series of low-risk tasks rather than a search for one powerful cleaner, universal chemical recipe, or pressure-washer setting. For most homes, the routine consists of gentle washing, regular visual checks, clear drainage paths, vegetation and heat control, and prompt attention to damaged panels.
Vinyl siding products are not identical. Profiles, finishes, installation details, approved cleaners, painting rules, and warranty terms can differ. Begin with the care guide for the exact product on the house, then escalate only when ordinary soap, water, and careful inspection are not enough.
Start With the Siding Manufacturer, Then Build a Practical Schedule
Cleaning vinyl siding about once a year is a useful general baseline, not a universal technical requirement for every product, climate, or home. CertainTeed recommends annual cleaning for its siding to limit buildup, while distinguishing among environmental dirt, chalk, algae, and mildew rather than treating every discoloration as the same condition. Its instructions apply to its products and should not automatically be transferred to another brand. See CertainTeed’s vinyl siding cleaning instructions.
Inspect the siding while washing it. Cleaning brings you close enough to notice changes that may be difficult to see from the street, including a hairline crack, unlocked edge, bowed panel, impact mark, unusual gap, or stain that repeatedly returns near an opening.
Also complete a focused inspection after events that could disturb the cladding:
- Hail or wind-driven debris
- High winds or severe thunderstorms
- Ice or falling branches
- Exterior construction near the wall
- Accidental impacts from ladders, lawn equipment, bins, or other heavy objects
Exposure should influence frequency. A wall beneath dense trees or in persistent shade may develop biological growth sooner than an open, sunny elevation. Heavy pollen, road dust, salt residue, humid conditions, or recurring runoff may also justify spot cleaning or additional inspections between annual washes. These conditions support adjusting the routine according to what you observe; they do not establish one fixed timetable for every climate.
Before choosing a cleaner, pressure-washing method, coating, caulk, or repair technique, locate:
- The care and maintenance guide for the exact siding product
- The applicable product and installation warranty
Look for an invoice, leftover carton, product label, installer record, permit file, or warranty paperwork. If the installer is still operating, ask for the manufacturer, product line, profile, color, and installation instructions. Take particular care with insulated siding, polymer products, previously painted siding, and products covered by a transferable warranty.
If the manufacturer cannot be identified, use the lowest-risk approach: hand wash with water, mild soap, and a nonabrasive cloth, sponge, or soft-bristle brush. Avoid aggressive chemicals, pressure washing, painting, extensive caulking, and irreversible repairs until a siding professional can help identify the product.
A practical maintenance calendar is:
| Time | Maintenance task |
|---|---|
| Annual baseline | Complete a gentle wash and full walk-around inspection |
| Spring | Check winter damage, lower courses, gutters, downspouts, runoff, openings, and plant growth |
| Summer | Watch for heat distortion, reflected glare, algae, and vegetation contact |
| Fall | Remove leaves and damp debris; clear gutters and check drainage |
| Winter | Observe ice, snow, wind damage, and recurring wet areas without attempting inaccessible work |
| After severe weather | Inspect corners, locks, openings, rooflines, impact zones, and loose panels |
Maintenance is prudent, but it cannot guarantee a particular siding lifespan. It also does not guarantee energy savings, increased property value, avoidance of structural damage, or a specific reduction in future repair costs. Its practical value is simpler: it keeps the exterior clean enough to inspect and helps homeowners recognize visible problems before deciding what action is appropriate.
The Lowest-Risk Way to Wash Vinyl Siding
For ordinary dirt, soot, pollen, grime, or chalk accumulation, start with basic equipment:
- A garden hose with gentle flow
- A bucket of warm water
- Mild soap approved for the siding
- A soft cloth or nonabrasive sponge
- A soft-bristle brush, optionally with a long handle
Textured siding requires particular care. Use a soft-bristle brush gently so dirt or staining is not smeared or worked more deeply into the grooves. Norandex also recommends avoiding surface abrasion and thoroughly rinsing each cleaned area. Review Norandex’s vinyl siding care guidance.
A careful washing workflow
-
Read the siding and cleaner instructions. Confirm that the proposed soap or cleaner is compatible. Follow the cleaner label’s directions for dilution, personal protective equipment, plant protection, use, and disposal.
-
Choose manageable conditions. Avoid intense sun or other conditions that would dry soap onto the wall before it can be rinsed. Do not begin if wind, wet footing, or limited access would prevent controlled washing.
-
Prepare the house. Close windows and doors. Identify vents, open seams, exterior receptacles, light fixtures, utility penetrations, cameras, doorbells, meters, and other components that should not receive cleaning solution or prolonged rinsing.
-
Protect adjacent areas. Move furniture and portable objects away from the wall. Protect plants and sensitive surfaces as directed by the cleaner label; do not assume a household cleaner is harmless to landscaping.
-
Test a concealed area. Apply the solution with the proposed tool to a small, inconspicuous section. Let it dry before deciding whether the treatment changed the color, sheen, or texture.
-
Work in manageable sections. Lightly wet the area, apply the mild solution, and scrub gently. Do not allow cleaner or soap residue to dry on the wall.
-
Rinse completely. Use clean water to remove residue while limiting prolonged spraying around openings, joints, and ventilated areas.
Several manufacturers recommend washing from the bottom upward to limit streaking and then rinsing from the top downward. ProVia gives this direction for whole-wall washing and recommends mild soap, warm water, a soft brush, and a garden-hose rinse for its vinyl products. Consult ProVia’s cleaning and maintenance guide. Because published directions can differ, the instructions for the exact siding product should control.
Regardless of the working direction, keep water flowing over the face of the cladding rather than into it. Avoid directing cleaning solution or sustained rinsing toward:
- Panel seams and open joints
- Soffit or wall vents
- Window and door perimeters
- Exterior electrical equipment
- Lights, cameras, and doorbells
- Hose bibs, pipes, meters, and utility penetrations
- Adjacent surfaces not intended for washing
Wear the personal protective equipment specified on the cleaner label, which may include gloves, eye protection, or protective clothing. Follow the chemical manufacturer’s use and disposal instructions. Manufacturer guidance also emphasizes keeping cleaners away from fixtures and unrelated surfaces and limiting prolonged rinsing around ventilated openings. CertainTeed details these cleaning precautions in its product guidance.
Keep the job within safe reach. A long-handled soft brush can reduce the need for elevation, but it does not make every upper wall accessible. Delegate elevated cleaning when the homeowner lacks the equipment, access, or experience needed to keep tools and water under control.
Match the Cleaner to the Stain—Without Treating Homemade Recipes as Universal
Use a least-aggressive-first decision process:
- Loose dust, pollen, cobwebs, or debris: Begin with plain water and a gentle hose rinse.
- Ordinary dirt, soot, grime, or chalk: Use warm water, mild soap, and a soft cloth, sponge, or brush.
- A persistent localized stain: Use a tested cleaner expressly compatible with the siding.
- Mildew or algae that resists mild washing: Use a product-approved treatment only when necessary, following both its label and the siding manufacturer’s instructions.
- Paint, oil, tar, rust, oxidation, or an unidentified stain: Stop experimenting and obtain product-specific advice.
Identify the condition as far as possible without overdiagnosing it. Ordinary dirt often follows exposure patterns. Chalk is generally a dull film associated with weathered pigmented surfaces. Algae may appear where moisture and environmental conditions support it. Mildew can grow on surface dirt in warm, humid, shaded, or sheltered locations. Surface growth alone does not prove water is trapped behind the siding.
Homemade recipes require caution. Published instructions differ substantially on vinegar, bleach, TSP-type products, degreasers, and their concentrations. Some manufacturers discourage bleach, while other product guidance gives a narrowly specified diluted treatment for particular mildew conditions. Vinegar recommendations also vary. Those disagreements are a reason not to present one mixture as universally safe.
Use this order of authority:
- The exact siding manufacturer’s current instructions
- The cleaner label and product data
- An inconspicuous test permitted by both
- Product-specific advice from a qualified siding professional if the first three are inconclusive
Recommendations taken from different sources should not be merged into a new formula. Cleaner-specific precautions and protective equipment remain necessary even when a product is sold for household use. Florida Paints’ technical bulletin illustrates how cleaner formulas and precautions vary by condition.
Commonly discouraged products and tools include:
- Harsh or organic solvents
- Undiluted bleach
- Pool chlorine
- Acetone and nail-polish remover
- Furniture polish or furniture cleaners
- Strong solvent-containing degreasers
- Steel wool or steel brushes
- Abrasive pads and harsh scrubbers
- Aggressive scraping or scrubbing
Difficult stains require restraint. Photograph the area, identify the likely source if possible, and ask the siding manufacturer which treatment is approved.
Recurring mildew or algae should prompt more than repeated chemical treatment. Check whether the wall remains shaded, vegetation limits airflow, leaves or mulch collect against the lower courses, a gutter overflows, a downspout drains poorly, or an opening shows evidence of leakage. Correcting the contributing condition may be more useful than repeatedly applying stronger cleaner to the symptom.
Pressure Washing Is Product-Dependent, Not a Default Maintenance Step
Hand washing is the lower-risk default because it provides more control over force, direction, and water volume. It also makes it easier to stop when a seam, loose panel, opening, or surface change becomes apparent.
Pressure-washing guidance is genuinely conflicting. ProVia strongly discourages the practice because the force may damage siding or drive water behind it. The manufacturer’s limited fallback advice for someone who proceeds despite that warning does not make pressure washing its preferred method. ProVia explains its pressure-washing position in its maintenance guide.
CertainTeed likewise does not recommend power washing vinyl or polymer siding because of the possibility of moisture intrusion, physical damage, or discoloration. It recommends hand-applied soapy water followed by a garden-hose rinse for general dirt, soot, grime, and chalk.
Some contractor and paint-industry guidance permits cautious pressure washing. This conflict does not establish a universal safe technique; it demonstrates why the exact product instructions and warranty should control. There is no supported generic PSI, nozzle, spray width, or stand-off distance that can be declared safe for every vinyl siding system.
Before using powered equipment, verify that:
- The exact siding manufacturer permits it
- The method complies with the applicable warranty
- Panels and locking edges are intact
- Water can be controlled around windows, doors, vents, fixtures, and penetrations
- The operator can work from a stable, accessible position
- The wall can first be tested in an inconspicuous area
Where the manufacturer expressly permits pressure washing, use only its specified method. General controls supported across the available guidance include testing first, avoiding aggressive pressure, directing the stream downward, and keeping spray away from seams, vents, windows, doors, utilities, and other openings. Do not aim upward beneath laps or use concentrated spray to chase a stain into a joint.
The reason relates to how the wall works. Vinyl siding is cladding designed primarily to shed rain. It is not the wall’s only water-control layer. Flashing, drainage paths, and the water-resistive barrier behind the siding help manage incidental moisture.
Pressure washing is also a poor choice when the siding cannot be identified, panels are loose, stains repeatedly appear near openings, or the upper wall cannot be reached with adequate control. Hire an appropriate professional when product identification, access, or water control is uncertain. Professional equipment does not make a method compatible with siding whose manufacturer prohibits it.
Inspect the Panels and the Water-Management Details Around Them
Use a consistent route so no area is missed. Begin at one corner and walk the entire perimeter, looking from the foundation upward. Then make a second pass focused on openings, transitions, and penetrations.
Inspection map
- Main wall fields
- Inside and outside corners
- Lower courses near soil, paving, decks, and landscaping
- Gable ends and roof-to-wall intersections
- Eaves and soffit transitions
- Windows and doors
- Vents and exhaust outlets
- Exterior lights, receptacles, cameras, and doorbells
- Meters, service equipment, hose bibs, pipes, and utility penetrations
- Areas below gutters, downspouts, valleys, and concentrated roof runoff
- Locations previously repaired, stained, or loosened
Look for visible panel symptoms such as cracks, holes, dents, pitting, damaged locking edges, loose or missing panels, buckling, warping, impact marks, and unusual gaps. Note whether a panel has shifted, repeatedly unlocked, or stopped lying in the same plane as adjacent courses.
Document surface conditions separately:
- Ordinary dirt or pollen
- Uniform fading
- Localized discoloration
- Chalk accumulation
- Mildew or algae
- Rust-colored or dark runoff marks
- Stains that recur after cleaning
- Gloss or texture changes associated with chemicals or heat
Distinguishing cosmetic conditions from functional defects helps guide the response. Dirt and relatively uniform fading may be cosmetic. An open crack, missing panel, broken lock, deformation, or significant gap may interfere with water shedding or the product’s intended movement, depending on the siding and installation.
Surface mildew alone does not establish concealed water damage. Growth may occur on accumulated dirt where shade, warmth, humidity, and limited rainfall create suitable conditions. Conversely, a clean-looking exterior does not prove that the sheathing, flashing, and water-resistive barrier behind it are dry and intact.
Conditions that justify further investigation include:
- A stain that repeatedly returns beneath or beside an opening
- Water visible inside or around a window or door
- Panels that repeatedly shift, unlock, or deform
- Damp or deteriorated sheathing exposed during a repair
- A torn or missing water-resistive barrier
- Rot, mold-like growth, insect activity, or damaged wood
- Missing, damaged, or poorly integrated flashing
- Persistent wetness at a roof-to-wall transition
- Several panels failing in the same area
Contractor maintenance guidance commonly recommends seasonal and post-storm inspections for cracks, looseness, warping, gaps, growth, and moisture symptoms. It also connects recurring conditions with gutters, downspouts, leaks, debris, and vegetation rather than cleaning alone. See Hoosier Windows’ maintenance and inspection overview.
Take dated photographs when a condition is not immediately urgent. Include one context image and one close-up, ideally from the same position each time. A ruler or fixed reference can help show whether a gap or deformation is changing. Comparable photographs make it easier to distinguish stable cosmetic variation from progressive movement, buckling, fading, or staining.
Prevent Moisture, Heat, Impact, and Vegetation Damage
Effective maintenance extends beyond the panels. Many recurring exterior symptoms originate with water, heat, vegetation contact, or impact elsewhere.
Manage roof water and drainage. Clear gutter obstructions and correct leaks, separated joints, or overflow. Confirm that downspouts discharge where water can move away from the wall rather than repeatedly splashing the lower siding or saturating the foundation edge. Observe grading and recurring wet areas after rain.
Do not treat every stain as a cleaning-only problem. Examine roof runoff, flashing, penetrations, drainage, and nearby surfaces. A streak beneath a leaking gutter joint may return until the joint is corrected. A stain beside a window may warrant investigation before another wash.
Keep leaves, mulch, soil, and damp debris from accumulating against lower siding courses. These materials can retain moisture, hide damage, and obstruct inspection. Avoid raising planting beds or adding mulch in a way that buries siding that was previously exposed.
Trim shrubs, vines, and branches to prevent rubbing and allow inspection and airflow. Commercial maintenance guidance sometimes suggests approximately 6 to 12 inches of plant clearance, but that range is not a universal manufacturer requirement. Bellari discusses the 6-to-12-inch range in its general siding guide. Use the product instructions, plant needs, local conditions, and enough practical space to prevent contact and permit access.
Protect panels from physical damage:
- Direct mower and trimmer discharge away from the wall
- Avoid striking lower courses with tools or equipment
- Do not rest heavy objects against the siding
- Control ladders rather than dragging them across panels
- Prune branches that scrape the wall in wind
- Keep sports equipment and wheeled bins from repeated impact
- Inspect promptly after hail or flying debris
Heat also requires attention. Keep grills, fire pits, patio heaters, and other heat sources away from vinyl according to both the appliance and siding guidance. There is no single safe clearance for every appliance, siding product, wind condition, or wall configuration.
Extreme direct heat and concentrated reflection from windows can deform or melt vinyl. Reflected glare may affect another wall even when no appliance is nearby. Contractor guidance identifies grills, fire pits, extreme heat, and reflected window glare as possible causes of deformation. Review the heat precautions described by Mighty Dog Roofing.
A seasonal prevention routine keeps the work manageable:
| Season | Focus |
|---|---|
| Spring | Inspect winter and storm damage; wash gently; check drainage, gutters, lower courses, and openings |
| Summer | Watch for heat distortion, reflected glare, algae, vegetation contact, and equipment impacts |
| Fall | Clear gutters and downspouts; remove leaves and damp debris; trim rubbing branches and vines |
| Winter | Monitor ice, snow, wind, and recurring moisture without attempting inaccessible work |
Decide Whether to Monitor, Repair, Stop Work, or Call a Professional
Not every symptom requires the same response. Choose the least invasive action appropriate to the condition, then escalate when safe access, concealed materials, or the wall’s water-management details are involved.
| Symptom or condition | Outcome | Practical response |
|---|---|---|
| Loose dust, pollen, surface dirt, or a removable stain | Clean | Use water, mild soap if needed, and a soft tool |
| Uniform fading, stable cosmetic variation, or a small unchanged mark | Monitor and photograph | Record the date and compare under similar lighting |
| One accessible loose or cracked panel with intact surrounding materials and a compatible replacement | Make a limited repair | Follow the exact installation instructions and preserve movement and drainage |
| Exposed wet materials, damaged housewrap, rot, mold-like growth, insects, failed flashing, utilities, or roofline involvement | Stop DIY work | Avoid expanding the opening and arrange an appropriate assessment |
| Repeated looseness, water stains, several damaged panels, failed flashing, or uncertain concealed conditions | Request professional assessment | Ask for diagnosis of the cause, not merely cosmetic replacement |
A possible DIY candidate is narrow: one safely accessible loose or cracked panel in an open wall area; a compatible replacement is available; the surrounding panels and locking edges remain intact; and there is no visible moisture or concealed deterioration. The homeowner must also have the applicable product instructions, suitable tools, and enough understanding to avoid damaging adjacent courses.
Vinyl panels must retain room for product-specified expansion and contraction. They also need to lock together and preserve intended drainage paths. Depending on the product and installation, face-nailing, fastening too tightly, placing fasteners incorrectly, or sealing drainage points can contribute to buckling, separation, or moisture problems.
Caulk is not a universal repair. It does not restore a broken panel lock, replace missing flashing, or recreate a damaged drainage detail. Excessive or misplaced caulk may restrict movement or trap water. Contractor repair guidance recommends stopping when panel removal exposes wet sheathing, damaged housewrap, deteriorated wood, mold-like growth, insect damage, missing flashing, or compromised framing. See Suburban Construction’s DIY-versus-professional repair criteria.
Stop DIY work when the damage involves:
- Wet or deteriorated sheathing
- A torn, missing, or incorrectly lapped water-resistive barrier
- Rot, mold-like growth, insects, or damaged framing
- Missing or failed flashing
- Windows, doors, or roof-to-wall transitions
- Electrical, gas, plumbing, or communications equipment
- Work beyond safe access
- Several panels or multiple courses
- A cause that remains uncertain after surface inspection
Replacement compatibility involves more than color. A panel should match the profile, exposed height, locking system, thickness, texture, and applicable installation requirements. A similar-looking panel may not lock, fasten, or move correctly.
Visual matching can still be difficult. Existing siding may have weathered or faded, and an older profile may be discontinued. Even a mechanically compatible replacement may remain visibly different. For a prominent elevation or unavailable product, ask a siding professional about product-specific options.
Request professional assessment for recurring loose panels, water stains, failed flashing, repeated repairs, multi-panel impact damage, or uncertain concealed conditions. Professional help is also appropriate whenever the repair exceeds the homeowner’s access, tools, or competence.
Know When Cleaning Is Not Enough: Painting, Panel Replacement, or Broader Replacement
Begin by putting the condition in the correct category.
Ordinary dirt: Clean it using the least aggressive compatible method. Reassess only after the siding is dry.
Uniform fading: Treat it initially as a cosmetic condition. Fading alone does not prove that panels have failed or must be replaced.
Isolated panel damage: Consider panel-by-panel replacement when compatible material is available, surrounding locks remain functional, and the wall behind the siding appears sound.
Widespread or recurring failure: Seek professional assessment for broad warping, extensive cracking, brittleness, water infiltration, concealed deterioration, or repeated failure in several areas. These are reasons for evaluation and possible replacement, not automatic rules that every wall must be replaced.
Localized discoloration deserves closer attention when accompanied by deformation, cracks, biological growth, recurring repairs, or moisture symptoms. Staining around an opening may point to runoff or a water-management problem. Cleaning can clarify the surface, but it should not replace investigation when the pattern repeatedly returns.
Painting is product-dependent. First ask the siding manufacturer whether the product may be painted and whether painting affects the warranty. Some vinyl products are intended to retain their factory finish without field painting; others may be paintable under specified conditions.
If painting is permitted:
- Inspect for cracks, pitting, warping, buckling, brittleness, and failed panels.
- Repair or replace unsuitable material instead of concealing deterioration with paint.
- Clean the siding using an approved method.
- Let it dry as required by the coating instructions.
- Use a coating identified as compatible with vinyl.
- Follow the coating’s product data sheet for preparation, application weather, and drying.
- Choose a color permitted by the siding and coating manufacturers.
Color choice affects heat absorption. An unsuitable coating or color can increase surface temperature and contribute to warping or buckling. The rule should not be simplified to either “all darker colors are prohibited” or “any darker color is safe.” Follow product-specific color restrictions. Florida Paints, for example, connects coating and color selection with heat-related deformation and recommends inspecting the siding before painting. Read the company’s cleaning and painting guidance.
Homeowners comparing vinyl’s maintenance demands with other claddings can consult Siding Spot’s informational comparison of house siding types, maintenance, lifespan, and failure modes. Siding Spot says it does not sell or install siding and does not accept contractor payment for placement. Its About page describes that editorial role.
Frequently Asked Questions
How often should vinyl siding be cleaned?
About once a year is a practical general baseline. Clean or inspect more often when the house is exposed to heavy pollen, dust, salt, persistent humidity, dense shade, trees, or recurring algae or mildew. CertainTeed recommends annual cleaning for its products, while broader commercial guidance also supports adjusting the frequency for local exposure. Use observed conditions and the exact manufacturer’s instructions rather than imposing a fixed monthly or twice-yearly schedule on every home.
Inspect while cleaning and after hail, high winds, severe storms, falling branches, or other impacts. Spring and fall drainage and vegetation checks can supplement the annual full wash.
Is bleach or vinegar safe for vinyl siding?
Neither bleach nor vinegar is universally safe or universally prohibited for every vinyl siding product. Manufacturer advice and published concentrations differ substantially. Some manufacturers discourage bleach, while other product guidance permits a specific diluted treatment under limited conditions. Vinegar recommendations vary as well.
Check the exact siding care guide and cleaner label, then test an approved treatment in an inconspicuous area. Do not use undiluted bleach or pool chlorine, and do not combine products unless the chemical or siding manufacturer expressly directs it. Mild soap and water remain the safer starting point.
Can vinyl siding be pressure washed?
Some manufacturers strongly discourage or do not recommend pressure washing because it can damage panels, cause discoloration, or force water behind the cladding. Other commercial guidance permits cautious use, so the answer depends on the exact siding product and warranty.
Do not rely on a generic PSI, nozzle, angle, or stand-off distance. If the manufacturer expressly permits pressure washing, follow its specified method, test first, avoid aggressive pressure, direct water downward, and keep the spray away from seams, vents, windows, doors, utilities, and other openings. Otherwise, hand wash or hire an appropriate professional.
Can a cracked vinyl siding panel be sealed with caulk?
Caulk is not a universal substitute for replacing a cracked panel. Depending on where and how it is applied, it may restrict movement, block drainage, or conceal a defect without restoring the panel’s locking or water-shedding function. It also cannot correct failed flashing or concealed damage.
Determine why the panel cracked and whether the wall behind it is sound. Where the product instructions support the work, a compatible replacement panel may be appropriate for an isolated, accessible defect. Obtain professional help when the crack is near an opening, roofline, utility, moisture stain, or broader area of damage.
When should vinyl siding damage be evaluated by a professional?
Request professional assessment when damage involves water stains, failed or missing flashing, windows, doors, rooflines, utilities, inaccessible work, several panels, recurring looseness, or uncertainty about concealed conditions.
Stop DIY work if removing a panel reveals wet sheathing, damaged housewrap, deteriorated wood, mold-like growth, insects, missing flashing, or compromised framing. The same repair guidance recommends professional involvement when moisture, openings, multiple panels, elevated walls, or concealed conditions are involved. Review the detailed repair-triage guidance.
A concise annual checklist brings the routine together:
- Verify the siding product, care instructions, and warranty.
- Wash gently with water, mild soap, and a soft tool.
- Test any stronger compatible cleaner before broader use.
- Inspect panels, locks, corners, openings, rooflines, and penetrations.
- Clear gutters, downspouts, drainage paths, leaves, and damp debris.
- Trim vegetation that rubs the wall or restricts access and airflow.
- Control heat, reflected glare, equipment impacts, and heavy objects.
- Take dated photographs of changes and recurring stains.
- Escalate moisture-related, concealed, inaccessible, or multi-panel problems.
The safest vinyl siding maintenance plan remains manufacturer-first and least-aggressive-first—not a universal chemical formula, caulk fix, or pressure-washer setting.