
A Cedar Siding House: Cost and Care
Future cleaning, finish renewal, access equipment, spot repairs and replacement material all belong in cedar's long-term ownership cost.
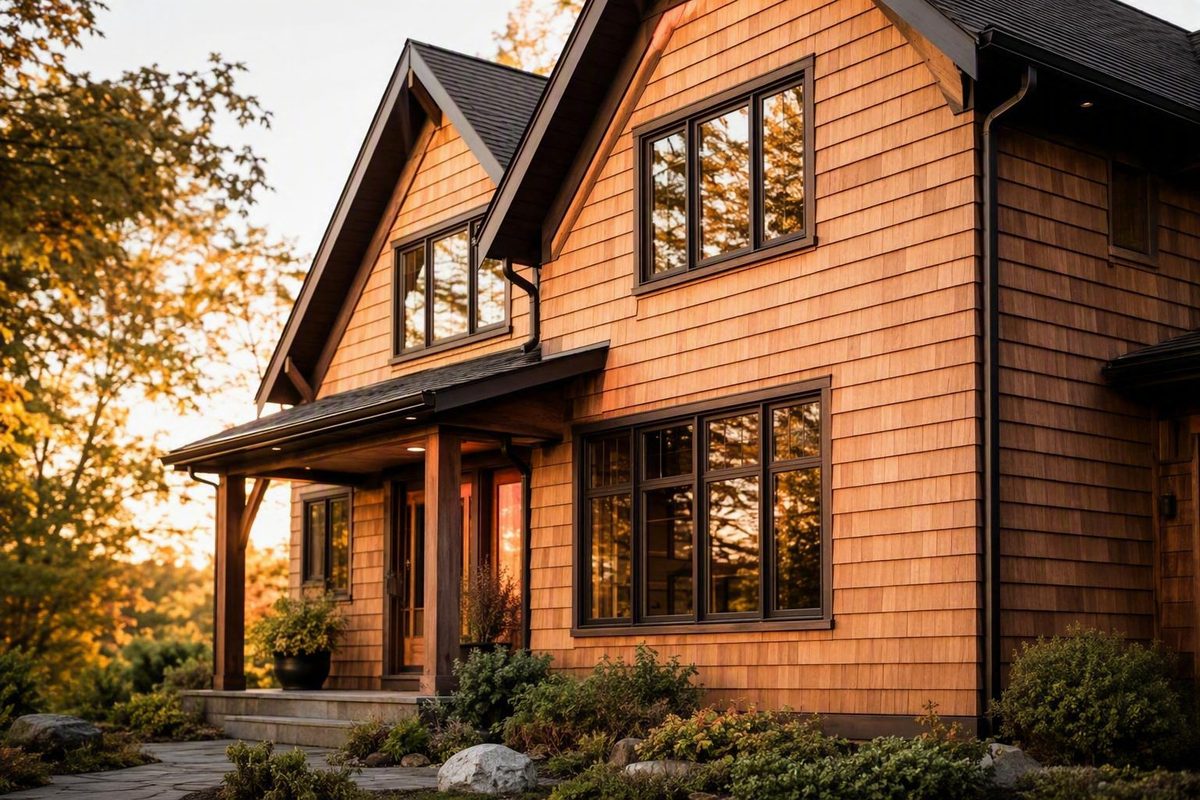
A cedar siding house can look warm, textured, and unmistakably natural. Depending on the profile, grade, texture, and finish, cedar can suit a weathered coastal cottage, knotty cabin, formal traditional home, or clean-lined contemporary exterior.
That versatility comes with an obligation. Cedar is real wood exposed to sunlight, rain, humidity, biological growth, and temperature changes. It needs appropriate installation, reliable drainage, routine inspection, gentle cleaning, prompt repairs, and periodic finish renewal. Its natural resistance to some forms of deterioration does not make it maintenance-free, rot-proof, pest-proof, or weatherproof.
The practical question is not simply whether cedar looks good. It is whether the appearance, finishing flexibility, and repairability of natural wood are valuable enough to justify the complete installed cost and an elevation-specific maintenance plan. Because available cost and performance evidence is largely commercial, this guide should be used as a cautious planning overview—not as a substitute for product instructions, project specifications, local code review, or advice from a qualified building-envelope professional.
What counts as cedar siding on a house?
Cedar siding is exterior cladding made from natural cedar wood. Products described as cedar siding include both red and white cedar, but species alone does not determine how a particular exterior will perform. Grade, thickness, profile, finish, installation, climate, and moisture management also matter. The available evidence does not support naming one cedar species as universally best.
Bevel siding—also called clapboard or lap siding—is one of the most familiar formats. Each board is thicker at the butt and tapers toward the opposite edge. The boards are installed horizontally, with one course overlapping the next. This produces regular shadow lines and helps shed water down the exterior. Bevel is commonly associated with traditional cedar houses.
Other cedar formats are not interchangeable labels:
-
Shingles are relatively uniform individual pieces or panels.
-
Tongue-and-groove boards interlock along their edges.
Retail listings confirm that cedar is sold in several grades and profiles, including bevel, tongue-and-groove, shiplap, channel, and rainscreen products, although availability varies by supplier in this Western red cedar product collection.
| Format | Basic appearance | Typical orientation | Evidence limitations |
|---|---|---|---|
| Bevel or clapboard | Tapered, overlapping courses with horizontal shadow lines | Horizontal | Exact overlap, exposure, and fastening depend on the product specification |
| Shingles | Repeating small units with even or staggered butts | Courses, usually horizontal | Maintenance instructions are often manufacturer- and product-specific |
| Shakes | Thicker or more irregular-looking units | Courses, usually horizontal | “Shake” and “shingle” are sometimes used loosely in marketing |
| Tongue-and-groove | Interlocking boards with relatively continuous lines | Horizontal, vertical, or diagonal where approved | The joint alone does not establish drainage or exterior-wall suitability |
| Shiplap | Boards with overlapping edge joints | Horizontal or vertical where approved | Face width, joint shape, and fastening requirements vary |
| Channel | Pronounced recessed joint between boards | Often horizontal or vertical | Channel dimensions and installation details are product-specific |
| Rainscreen profile or system | Open or defined joints over a drained cavity | Often horizontal or vertical | The complete wall design matters, not just the visible board |
| Board-and-batten | Wide boards separated or covered by narrow battens | Usually vertical | Board width, joint design, and drainage details vary by system |
It changes the number and type of joints, depth of shadow lines, apparent scale, installed exposure, material takeoff, fastening method, cutting labor, and architectural character. A broad horizontal reveal can make a wall feel calm and expansive. Narrow courses create more texture. Vertical boards emphasize height, while shingles break a large elevation into smaller visual units.
A “cedar-sided house” also does not necessarily have cedar on every wall. Cedar may cover the entire exterior or appear only on gables, dormers, entries, porch ceilings, soffits, accent walls, or additions. It can also be used for localized repairs on an older house. Limiting cedar to selected areas preserves some natural-wood character while reducing the surface area that will eventually need cleaning or refinishing.
Installation and maintenance directions must follow the actual product. A shingle manufacturer’s requirements for exposure, pressure, drying time, or coating application should not automatically be applied to bevel boards, shakes, tongue-and-groove planks, or an open-joint rainscreen.
Before accepting a proposal, ask the contractor to identify the exact manufacturer, product, profile, grade, intended exposed face, installed exposure, finish system, fastening specification, and wall-assembly details. General statements such as “standard cedar installation” are not a substitute for product-specific documentation.
How profile, grade, texture, and finish shape the exterior
Bevel siding and shingles are closely associated with traditional houses, but cedar is not confined to historic or rustic design. Crisp vertical applications, narrow joint lines, clear boards, dark opaque finishes, and selective wood accents can all suit contemporary architecture.
Grade has a major visual effect:
- Clear Vertical Grain, commonly abbreviated CVG, creates a more uniform and refined surface with fewer visible knots.
- Select Knotty or tight-knot material makes knots and natural variation part of the design, producing a more informal or rustic appearance.
- Mixed or less-select grades may introduce wider variation that should be evaluated through representative samples rather than a single website image.
Retail listings demonstrate that clear and knotty grades exist and that clear material can carry a substantial displayed-price premium. In one collection, some nominal 1-by-6 knotty products are listed well below comparable Clear Vertical Grain products. However, the extracted “price per” unit is unclear, so the figures demonstrate only a point-in-time price difference—not a dependable square-foot cost according to the retailer’s grade and price listings.
Texture matters as much as grade. Rough-face siding scatters light, emphasizes grain, and can make stain look deeper or more varied. Smooth cedar tends to appear more formal and may make coating irregularities more noticeable. Some boards have one face intended for exposure, so that choice should be confirmed before installation.
Board width and installed exposure also change the scale of the facade. The nominal width printed in a product name is not necessarily the board’s actual width, and the visible exposure can be smaller again after overlap. Narrow exposures create many horizontal lines; wider exposures produce fewer, stronger bands. Shingles with aligned butts feel orderly, while staggered butts introduce more movement.
Finish adds another layer of character:
- Paint provides opaque color and conceals more grain, knots, and color variation.
-
Semi-transparent or penetrating stain leaves more of the wood visible.
-
Factory-prefinished cedar arrives with a coating already applied.
- Natural cedar may be installed with little or no color-altering finish where compatible with the product and wall design.
- Intentionally weathered cedar is selected with the expectation that its color will move toward gray.
Natural weathering is rarely uniform. Shaded walls can develop a different color from sunny walls. Allowing cedar to gray should not be treated as a guarantee of a perfectly even silver facade.
Four design scenarios show the range:
- Rustic knotty bevel siding: Rough-face, tight-knot boards in horizontal courses emphasize knots, grain, and shadow.
- Refined clear boards: Clear, smooth boards with controlled joint lines create a quieter, more uniform surface.
- Natural shingles allowed to gray: Small units add texture while gradual weathering becomes part of the intended appearance.
- Cedar accents paired with another cladding: Cedar on an entry, gable, or soffit adds real-wood warmth without committing every elevation to the same maintenance burden.
Obtain full-profile samples before deciding. View them vertically and horizontally, in direct sun and deep shade, and beside the proposed roof, masonry, trim, and windows. Apply the intended finish to several pieces. A small clear sample may not reveal the knots, roughness, color range, or weathered contrast likely to appear across a full order.
Cedar siding advantages and trade-offs
The strongest argument for cedar is straightforward: it is real wood. Its grain, knots, color variation, and weathering are intrinsic rather than printed or molded onto another material. Cedar can be cut and detailed with woodworking methods, is available in numerous profiles, and can support finishes ranging from opaque paint to transparent or semi-transparent stain.
Localized repair is another potential advantage. An isolated split board or damaged shingle may be replaceable without removing an entire elevation. Not every repair is simple: matching an aged profile and finish can be difficult, and concealed damage may require broader work. Even so, individual-piece replacement can be practical when deterioration is genuinely isolated.
The principal trade-off is recurring care. Cedar should not be described as maintenance-free. A realistic ownership plan includes inspections, cleaning when conditions warrant it, repair of damaged pieces or open transitions, vegetation management, and renewal of deteriorating coatings.
Moisture is the central risk. Persistent wetting, leaks, poor drainage, inadequate clearance, or trapped water can contribute to mold, staining, coating failure, buckling, cracking, softness, and rot. Repainting an unresolved leak may improve appearance temporarily while leaving the underlying problem active.
Untreated cedar is combustible. Any claim of improved fire performance must be supported by documentation for the exact product, treatment, applicable test, complete wall assembly, and installation details. Local code and project-specific requirements govern; a generic reference to “fire-treated cedar” is not enough. Commercial comparison material likewise distinguishes combustible untreated cedar from named fiber-cement systems marketed with documented fire-performance characteristics, but those claims cannot be transferred automatically to every fiber-cement product or assembly in this contractor’s cedar and fiber-cement comparison.
The same commercial comparison identifies insects and woodpeckers as possible sources of cedar damage. That does not mean every cedar house will experience them. Natural resistance to some forms of deterioration should not be confused with immunity to pests, decay, or moisture.
Claims at either extreme deserve caution. Cedar sellers may make sweeping durability or resistance claims, while competing-material sellers may characterize cedar as unusually fragile or short-lived. Neither position adequately accounts for species, grade, thickness, wall design, finish, exposure, workmanship, and maintenance. The available commercial comparisons do not support a universal cedar lifespan.
Cedar may fit when you:
- Place high value on authentic wood and natural variation.
- Want a profile or detail that benefits from woodworking.
- Accept recurring inspection and finish renewal.
- Have a credible project-specific plan for drainage, flashing, ventilation, and clearances.
- Can budget for future access, cleaning, repairs, and replacement pieces.
Cedar may be a poor fit when you:
- Want minimal routine exterior care.
- Expect the appearance to remain unchanged with exposure.
- Cannot afford practical access to upper walls for maintenance.
- Require documented noncombustible cladding or a particular rated assembly.
- Have unresolved drainage or moisture problems that will remain after installation.
Because authoritative installation standards were not included in the available evidence, homeowners should require the siding manufacturer’s current instructions and the contractor’s proposed wall details before work begins. Those documents should address the exact profile, substrate, water-resistive layer, flashing, drainage approach, fastening, finish, transitions, and clearances rather than relying on generic cedar guidance.
What a cedar siding house may cost
No retail board price can answer what a complete cedar exterior will cost. The closest available installed figures come from one commercial comparison updated in 2026: approximately $6 to $12 per square foot installed for cedar clapboard and $7 to $14 per square foot installed for cedar shingles. These are rough planning figures from one commercial source, not verified national benchmarks or firm estimates according to the 2026 cedar cost comparison.
“Siding area” means exterior cladding area—not interior living-floor area. An estimate based on 2,000 square feet of siding describes 2,000 square feet of exterior coverage. It should not be relabeled as the cost of siding a 2,000-square-foot house. Homes with the same floor area can have very different wall areas, heights, window counts, gables, and architectural complexity.
Use a project-specific budgeting worksheet:
- Measure gross wall area. Calculate each rectangle, triangle, gable, dormer, and projection separately.
- Account for openings. Record windows, doors, vents, and other areas that will not receive siding. Confirm how each bidder handles deductions.
- Specify the profile. Bevel, shingle, shake, board-and-batten, and tongue-and-groove products use material differently.
- Use installed exposure. Do not calculate coverage from nominal width alone.
- Include overlap and joint requirements. These can materially reduce visible coverage.
- Add a project-appropriate waste allowance. Corners, short returns, defects, angled cuts, pattern selection, and repair stock affect waste.
- Select species and grade. Clear material may carry a substantial displayed-price premium, although the retail evidence does not establish a universal square-foot difference.
- Price the finish system. Include preparation, primer where required, stain or paint, end treatment, and application labor.
- Include trim and accessories. Corners, window and door trim, starter details, flashings, fasteners, and transitions may be separate.
- Price removal and disposal. Existing siding, underlayment, and any special handling procedures change the scope.
- Allow for substrate repairs. Sheathing, flashing, water-resistive layers, furring, and concealed damage may not be visible before removal.
- Adjust for labor and access. Multiple stories, steep grades, scaffolding, lifts, landscaping, tight property lines, and complex roofs increase difficulty.
- Add freight and handling. Long boards and small special orders can be disproportionately expensive.
- Budget for ownership. Future cleaning, finish renewal, access equipment, spot repairs, and replacement material belong in the long-term total.
Nominal and actual dimensions show why product-specific takeoffs matter. One bevel-board seller lists nominal 1-by-6, 1-by-8, and 1-by-10 options with actual widths of approximately 5¼, 7¼, and 9¼ inches in the product description. The boards are listed as 11/16 inch thick at the butt and 3/16 inch at the tapered edge. Installed exposure will be smaller than actual width because the courses overlap. The seller also limits parcel shipments to 7 feet 10 inches and states that lengths from 8 to 12 feet require motor freight, illustrating why delivery can matter for a remote project or small repair in the retailer’s dimensions and shipping details.
That listing offers six-board packs totaling 24, 36, or 47 linear feet, depending on board length. Linear feet alone do not establish square-foot coverage. You still need installed exposure, usable lengths, the cutting plan, and waste. A retailer price may also apply per board, bundle, linear foot, sample, or another unit. Do not convert a displayed price into a square-foot rate unless both the selling unit and installed coverage are explicit.
Ask bidders to separate:
- Siding material
- Delivery and freight
- Installation labor
- Finish materials and application
- Trim, flashing, and accessories
- Existing-siding removal
- Disposal
- Scaffolding or lift access
- Sheathing or wall repairs
- Taxes, permits, and contingencies where applicable
Comparable bids should describe the same product, grade, profile, finish, exposure, wall preparation, trim scope, and access assumptions. A low material quote is not a low project quote if it excludes coating, freight, access, or necessary repairs.
Paint, stain, sealer, or natural weathering?
The appropriate finish depends on the desired appearance, existing coating, cedar product, exposure, and willingness to maintain it.
Paint supplies opaque color and conceals more grain, knots, and color variation. It can unify mixed boards or integrate cedar with a specific architectural palette. When paint deteriorates, peeling, blistering, or chalking may require substantial preparation before recoating.
Stain leaves more grain visible. Semi-transparent products preserve more natural variation, while solid-color stains provide greater color uniformity. “Stain” is a broad category, so preparation and recoat requirements should come from the named coating manufacturer rather than a generic schedule.
Clear or water-repellent sealers are intended to reduce moisture and ultraviolet exposure while retaining a natural-looking surface. They are not permanent barriers and cannot compensate for incorrect flashing, poor drainage, ground contact, or water entering behind the siding.
Factory-prefinished cedar is also available.
Natural weathering is a legitimate aesthetic choice. Unfinished cedar can move toward a silver-gray appearance, particularly in some shingle applications. That choice does not eliminate inspection, cleaning, clearance, or moisture-management needs. It also accepts that walls beneath eaves may weather differently from walls exposed to sun, wind, and rain.
A three-to-five-year interval is commonly cited as a planning benchmark for some stains and sealers, but it is not a universal deadline. A commercial home manufacturer reports approximately five to fifteen years between stain applications depending on weather and ultraviolet exposure in its cedar finishing discussion. By contrast, a cedar-shingle manufacturer gives a typical three-to-five-year interval for certain semi-transparent finishes while noting that exposure, color, wind, sunlight, and geography affect timing in its product-specific maintenance manual. The disagreement is a reason to inspect the coating and follow the named product’s instructions—not to select whichever number is more convenient.
Use an elevation-specific framework:
-
Shaded or vegetation-covered walls: Watch for mildew, algae, moss, retained dirt, and slow drying.
-
Wind-driven-rain exposures: Inspect joints, penetrations, and trim transitions closely.
- Walls below roof valleys or short overhangs: Look for concentrated runoff and splash patterns.
- Protected walls: Do not assume they are problem-free; sheltered areas may retain a different color or collect dirt.
Before applying a new finish, identify the existing coating. Penetrating stain, film-forming stain, paint, oil finish, weathering agent, and unknown coatings may require different preparation. Test adhesion and color in an inconspicuous location. Follow both the siding manufacturer’s and coating manufacturer’s instructions for cleaning, surface moisture, temperature, drying, and recoating.
A realistic cedar maintenance routine
An annual condition check is a practical baseline, but the clearest numeric support in the available evidence comes from a cedar-shingle manufacturer that recommends annual inspection of its shingle siding. Treat that as a useful starting point, not a universal rule for every cedar profile according to the shingle maintenance manual. Inspect again after severe storms, ice damage, roof or plumbing leaks, or the appearance of unusual staining.
One anonymously authored commercial repair guide recommends inspection at least twice yearly, but that is an aggressive commercial recommendation rather than a general standard in the repair company’s maintenance article.
Use this inspection checklist:
- Dirt, pollen, and debris
- Mold, mildew, algae, or other biological growth
- Moss, particularly in shaded or persistently wet areas
- Open joints or failed sealant at transitions
- Cracks, splits, or broken pieces
- Loose boards or shingles
- Cupping, buckling, or warping
- Peeling, flaking, blistering, or chalking
- Discoloration below roof runoff or deck connections
- Blue-black stains around fasteners
- Areas that appear soft or deteriorated
- Insect holes or bird damage
- Ground contact or inadequate clearance
- Rot or recurring wet areas
Keep shrubs, vines, and branches away where they trap moisture, restrict airflow, rub against the surface, or make inspection difficult. Check sprinklers, downspouts, roof drainage, deck connections, exterior penetrations, and splashback zones at the same time.
Cleaning should escalate only as needed:
- Start with a garden hose for loose dirt.
- Use a mild, non-phosphate detergent if water alone is insufficient.
- Gently agitate stubborn areas with a soft-bristle brush.
- Rinse thoroughly, directing water downward rather than into laps or joints.
- Treat confirmed biological growth with the mildest product compatible with the siding and finish.
- Allow the wall to dry adequately before evaluating or refinishing it.
Aggressive pressure washing is a poor routine-cleaning method because it can damage wood fibers or force water behind the siding. A shingle manufacturer specifically discourages pressure washing for routine cleaning, although its manual separately permits narrowly controlled pressure during certain restoration work. That limited product instruction should not be generalized to other profiles or normal washing.
Chemical guidance conflicts. Some commercial sources discourage chlorine bleach, while cedar guidance may permit diluted chlorine bleach or prefer oxygen bleach for mildew. No cleaner—including bleach, vinegar, oxalic acid, or another restoration chemical—should be treated as universally suitable. Identify the suspected growth and existing finish, consult both manufacturers, use the mildest compatible treatment, test a concealed area, follow label precautions, protect nearby plants and materials, control runoff, and rinse as directed. Western red cedar industry guidance discusses oxygen bleach and oxalic acid for specific conditions but also emphasizes cause-specific treatment in its care and maintenance guidance.
Cleaning frequency should respond to actual conditions. An annual inspection does not mean an annual chemical wash. A clean, dry elevation may need observation only, while a shaded wall may need targeted cleaning and improved airflow.
Before refinishing, the siding should be clean and adequately dry. Remove loose coating as directed by the finish manufacturer, and correct active leaks or drainage defects first. Coating over biological growth, wet wood, poor adhesion, or recurring water entry postpones rather than resolves failure.
Homeowners may choose to handle visual checks and gentle ground-level cleaning, provided they follow the product instructions and can do so without difficult access or uncontrolled chemical exposure. High-access work, widespread coating removal, chemical restoration, deteriorated substrates, and repairs around roofs, decks, windows, or electrical service are better evaluated by an appropriately qualified contractor.
Troubleshooting stains, peeling, mildew, and rot
Visible symptoms are clues, not complete diagnoses. First determine whether the problem is surface dirt, biological growth, coating deterioration, a fastener reaction, repeated wetting, or concealed wall deterioration.
| Symptom | Possible cause | Sensible next step |
|---|---|---|
| Ordinary dirt | Pollen, dust, splashback, or airborne debris | Begin with a hose, then mild detergent and a soft brush if needed |
| Mildew or mold-like spotting | Persistent dampness, shade, limited airflow, or surface contamination | Confirm the condition, reduce moisture and vegetation, then use a compatible treatment |
| Brown or reddish water or tannin staining | Water mobilizing natural extractives | Find and stop the moisture source before cosmetic treatment |
| Blue-black staining near nails | Iron reaction, rusting fasteners, or contaminated tools | Investigate fastener type and wetting; use compatible corrosion-resistant fasteners in repairs |
| Chalking | Paint film deteriorating into a powdery residue | Clean and assess the coating; do not assume the wood has failed |
| Peeling or flaking | Coating breakdown, poor preparation, incompatible layers, or moisture behind paint | Test adhesion and investigate moisture before scraping and recoating |
| Blistering | Trapped moisture, heat, poor adhesion, or application problems | Determine whether water is entering from behind or through exterior details |
| Cracks or splits | Movement, impact, weathering, fastening, or localized deterioration | Monitor minor defects; repair or replace pieces that admit water or have lost integrity |
| Apparent softness | Decay, prolonged wetting, or concealed damage | Avoid destructive probing and investigate the moisture source and wall condition |
| Moss | Long-term shade and dampness, poor clearance, or accumulated water | Correct the wet condition rather than treating it as ordinary color change |
| Rot | Prolonged moisture, ground contact, poor ventilation, leakage, or installation defects | Determine the extent and repair both the wood and the underlying cause |
Chalking deserves special emphasis. It is degradation of a paint film, not proof that the cedar beneath it has failed. Conversely, apparently intact paint does not prove that the wall behind it is dry.
Peeling, blistering, and flaking can result from poor adhesion, but recurring failures may indicate moisture behind the coating. Extractive bleeding and persistent water staining likewise call for a moisture-first investigation. Western red cedar industry guidance associates extractive staining with moisture, identifies chalking as paint-film deterioration, and connects many peeling or blistering problems with moisture and poor adhesion in its troubleshooting guidance.
Fasteners can create their own symptoms. Western red cedar guidance identifies hot-dipped galvanized, aluminum, and stainless-steel nails as options intended to reduce rust and blue-black iron-extractive staining. Replacement fasteners must still be compatible with the exact siding, substrate, exposure, and installation specification.
Heavy moss, widespread softness, or rot is more serious than normal weathering. Potential contributors include ground contact, accumulated water, inadequate ventilation, faulty flashing, roof runoff, deck connections, or chronic leakage. A cedar-shingle manufacturer characterizes heavy moss or rot as a likely installation or moisture-management warning. That diagnosis is specific to its shingle guidance, but the broader lesson remains useful: correct persistent wetting before treating the surface cosmetically.
Isolated damage may permit replacement of individual boards or shingles. Recurring stains, repeated coating failure, multiple soft areas, or deterioration across several elevations warrant broader investigation of the wall assembly before money is spent on refinishing.
For an older-house repair, match more than the word “cedar.” Record:
- Species, if known
- Profile and joint shape
- Butt and tapered-edge thickness
- Actual board width
- Installed exposure
- Face texture
- Grain and knot character
- Existing finish
- Degree and pattern of weathering
Order representative samples and test-finish them beside the existing siding. New cedar will rarely match decades of weathering immediately, and sheltered old boards may differ from exposed boards on the same house.
Some Western red cedar industry guidance identifies mild oxalic-acid solutions for persistent tannin, water, or iron staining after gentler cleaning is ineffective. Oxalic acid is not a general-purpose wash. Follow the named product’s instructions and safety precautions, test a concealed area, protect adjacent materials and runoff zones, and use professional help when access is difficult, staining is widespread, or the moisture source remains uncertain.
Cedar versus fiber cement: choosing for the house and location
Fiber cement is the principal cedar-look alternative in the available comparisons. This allows a homeowner to compare natural cedar with a manufactured system designed to create a related visual effect—but not to assume that the two materials will look, age, repair, or perform identically.
| Decision factor | Natural cedar | Fiber cement |
|---|---|---|
| Appearance | Authentic grain, knots, color variation, and natural weathering | Manufactured wood-inspired textures with more controlled repetition |
| Finish flexibility | Can be painted, stained, sealed, or allowed to weather where appropriate | Commonly painted or supplied with a factory color system |
| Routine maintenance | Requires inspection and recurring finish decisions | Often evaluated for lower routine finish demands, subject to the exact product |
| Localized repair | Individual pieces may be cut and replaced, although matching can be difficult | Repair method depends on product format, fastening, finish, and manufacturer instructions |
| Combustibility | Untreated natural wood burns | Products or assemblies with documented noncombustible performance are available; verify the exact system |
| Moisture exposure | Chronic wetting can cause staining, movement, coating failure, softness, or rot | Not automatically immune to water-related installation, joint, or coating problems |
| Pest concerns | Some commercial comparisons identify possible insect or woodpecker damage | Pest-related claims require exact product context; avoid assuming any cladding is universally pest-proof |
| Installation | Requires wood-siding skills and profile-specific detailing | May require product-specific cutting, handling, fastening, clearances, and dust controls |
| Ownership cost | Includes cleaning, finish renewal, access, and repair | Must include installation requirements, repainting where applicable, repairs, and eventual replacement |
Natural cedar is the stronger candidate when authentic material, grain variation, natural weathering, and localized woodworking matter enough to justify recurring care. It is particularly compelling when the homeowner wants a finish that preserves real grain or expects individual-piece repairs to remain part of the long-term strategy.
Fiber cement is worth evaluating when lower routine maintenance or documented noncombustible performance is a priority. A fiber-cement manufacturer markets several wood-inspired plank and shake appearances, showing the breadth of that design category, although its broader superiority claims reflect a commercial interest in its cedar-alternative overview.
Location changes the questions rather than dictating one answer:
- Wet sites: Ask how the wall drains, dries, and handles roof runoff.
- Shaded sites: Plan for biological-growth monitoring and vegetation control.
- Sunny sites: Ask how the selected finish may fade or erode.
- Coastal sites: Verify fastener compatibility, salt exposure, finish requirements, and maintenance instructions.
- Snowy sites: Examine clearances, drifting, splashback, and transitions near roofs and decks.
- Pest-prone sites: Ask how inspection and localized repair will be handled.
- Wildfire-prone sites: Do not rely on generic references to fire-retardant wood or “fire-resistant” siding. Consult local building officials and insurers, and obtain documentation for the exact product, treatment, test standard, and complete wall assembly.
The available evidence does not support precise climate-specific lifespan predictions for either material. Detailing, exposure, coating, installation, and maintenance can be as important as the broad material label.
Before choosing, answer these questions:
- Do I want authentic, nonrepeating grain or a wood-inspired appearance?
- Am I comfortable inspecting each elevation rather than following one universal calendar?
- How exposed are the walls to sun, shade, wind-driven rain, snow, vegetation, and splashback?
- What does local code require for this project?
- Is the contractor experienced with the exact profile and wall system?
- Which current manufacturer instructions will govern the installation?
- How would isolated damage be repaired and color-matched?
- Does the quote include material, labor, finish, trim, removal, access, freight, and substrate repairs?
- What cleaning, repainting, or restaining costs should be reserved?
- Is noncombustible performance merely a preference, or is a documented product or assembly required?
- Which warranties apply, and what installation or maintenance actions could affect them?
For readers comparing cedar with vinyl, fiber cement, metal, and engineered wood, Siding Spot publishes a broader overview of house-siding types, costs, maintenance, and failure modes. The available excerpt from that page contains no cedar-specific technical evidence, so it should be used only to structure a wider material comparison.
A cedar siding house is most compelling when authentic wood matters, recurring elevation-specific care is acceptable, and moisture-management and fire requirements can be verified for the exact project. Homeowners who place greater weight on predictable upkeep or documented noncombustible performance should compare cedar with fiber cement using complete installed and ownership costs—not photographs or board prices alone.
How often does cedar siding need to be stained or sealed?
There is no universal interval. Three to five years is a commonly cited planning benchmark for some stain and sealer systems, but a commercial home manufacturer reports intervals as long as five to fifteen years under varying weather and ultraviolet exposure. A commercial repair guide also recommends three to five years for some sealers while qualifying the interval by product and climate in its general maintenance advice.
Inspect the finish at least as part of the home’s regular condition review. Recoat according to its actual condition and the named coating manufacturer’s directions. Different elevations on the same house may need attention at different times.
Can cedar siding be left unfinished to turn gray?
Yes. Natural cedar can be allowed to weather toward a silver-gray appearance when that is compatible with the product and wall design. Expect uneven change: exposed walls, sheltered areas, and surfaces beneath overhangs may weather at different rates.
Leaving cedar unfinished does not eliminate maintenance. Continue watching for dirt, biological growth, open joints, chronic wetting, softness, moss, and rot. Drainage or ventilation problems should not be mistaken for harmless weathering.
Is it safe to pressure-wash cedar siding?
Aggressive pressure washing is generally a poor choice for routine cedar care because it can damage wood fibers or force water behind the cladding. Cedar-shingle manufacturer guidance recommends a garden hose, mild diluted detergent, soft brush, and downward rinse for routine cleaning rather than a pressure washer.
A manufacturer may permit narrowly controlled pressure for restoration of a particular product. That exception should not be applied to every cedar profile or finish. Difficult access and extensive restoration are better assessed by a contractor familiar with the specific siding and coating.
Can new cedar siding be matched to an older house?
Often, but a convincing match requires more than ordering the same nominal width. Match the species if known, profile, butt thickness, tapered edge, actual width, installed exposure, face texture, grain, knots, and finish.
Obtain representative samples and test-finish them beside the existing wall before ordering. New cedar will usually look different from aged material at first, and the old siding may itself vary from one elevation to another.
Is cedar siding better than fiber cement?
Neither is universally better. Cedar offers authentic grain, natural variation, flexible finishing, and practical localized woodworking. In return, it requires recurring inspection, moisture control, cleaning, and finish decisions. Untreated cedar is also combustible.
Fiber cement is worth considering when lower routine maintenance or documented noncombustible performance is important. Those characteristics must still be verified for the exact product and wall assembly; fiber cement should not be assumed to be identical to wood or immune to moisture and installation problems. Compare appearance, local code, contractor experience, repair methods, complete installed price, and long-term maintenance cost before deciding.