
Is Cedar Clapboard Siding the Right Choice?
Cedar is a premium real-wood choice whose appearance and repairability come with recurring maintenance and little tolerance for shortcuts.
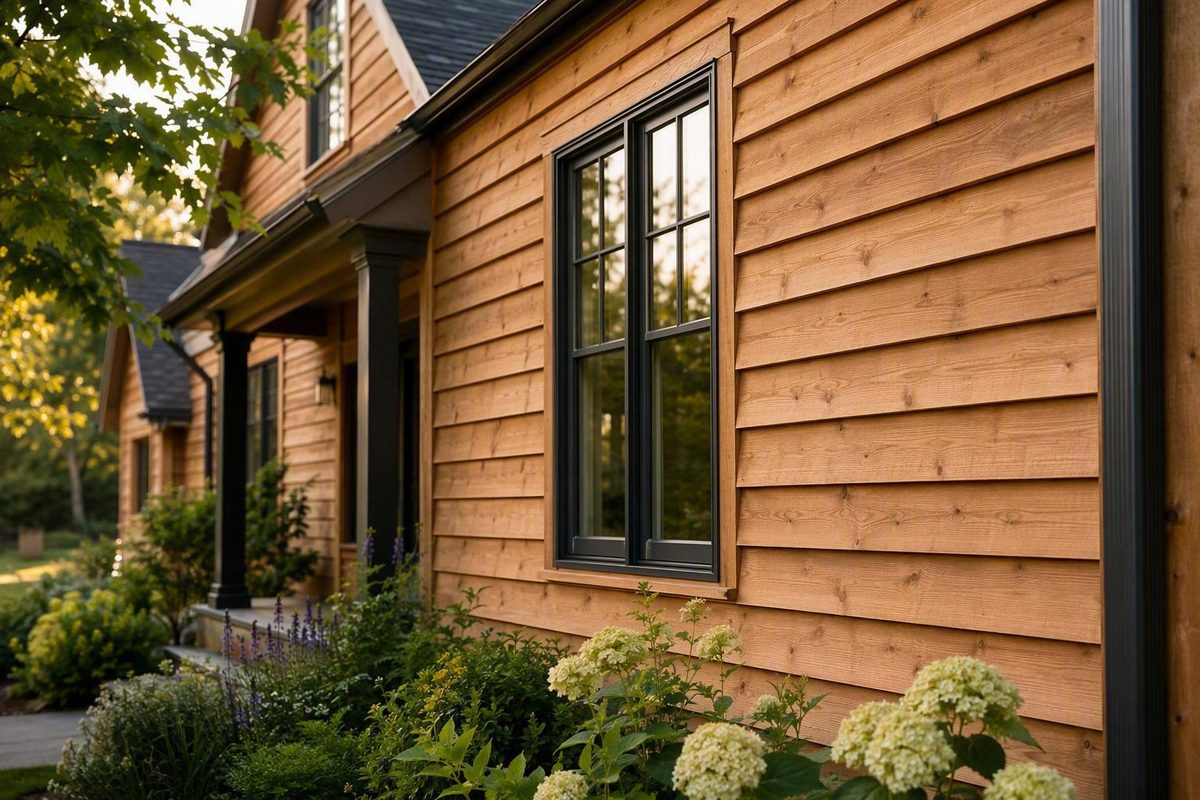
Cedar clapboard siding offers the grain, variation, and traditional shadow lines of real wood. It can also allow individual damaged boards to be replaced rather than requiring an entire wall section to be removed. Those advantages come with exacting purchasing, installation, and maintenance decisions: “cedar,” “1x8,” and even “clapboard” are not complete specifications.
A successful project starts by identifying the profile and stated species, then comparing grade, construction, face texture, actual dimensions, installed exposure, finish requirements, and available lengths. Coverage must be calculated from exposure rather than nominal width. Quotes must account for freight, finishing, waste, wall preparation, and moisture-management details—not merely the boards.
The central principle is simple: cedar clapboards are the visible layer of a wall system. Their performance also depends on the weather-resistive barrier, flashing, drainage path, compatible fasteners, protected cuts, required clearances, and compatible coating system behind and around them.
What cedar clapboard siding is—and which profiles are different
Traditional clapboards are tapered boards installed horizontally in overlapping courses. Each board has a thicker lower edge, called the butt, and a thinner upper edge or tip. The butt projects over the thin edge of the course below, creating the horizontal shadow lines associated with traditional wood-sided houses.
Traditional cedar clapboard siding is commonly marketed as cedar bevel siding. In that limited context, “clapboard” and “bevel” can usually be treated as interchangeable terms. The Western Red Cedar Lumber Association’s bevel-siding installation guidance describes bevel boards as clapboards installed from the bottom upward in overlapping courses and distinguishes ordinary bevel siding from rabbeted patterns.
That does not mean every horizontal cedar board is a clapboard. Common profiles include:
- Plain bevel or clapboard: A simple tapered board whose exposure is established during layout.
- Rabbeted bevel: A tapered board with a milled recess that helps courses interlock or space themselves.
These profiles should not be grouped under one installation method. With plain bevel siding, the installer establishes the exposure specified by the product schedule. Rabbeted bevel can be self-spacing but may still require a stated movement clearance.
Profile identification affects:
- Exposure and coverage: The overlap or interlock determines how much of each board remains visible.
- Fastening: A nail location appropriate for plain bevel may be wrong for an interlocking profile.
- Movement: Rabbeted and interlocking profiles can require deliberate clearance.
- Drainage: Edge and joint shapes influence how incidental water exits.
- Estimating: Boards with the same nominal width may cover different wall areas.
- Repairs: A replacement may look correct from the front but have the wrong taper, butt thickness, or rabbet.
For a repair, record more than the visible face. If a representative board can be removed without damaging surrounding work, document:
- Total actual width
- Butt thickness
- Tip thickness
- Installed exposure
- Face texture
- Taper, rabbet, notch, or interlock shape
- Board length and existing joint locations
- Which face appears to have been intended for exposure
- Paint or stain buildup that may obscure the original dimensions
Older dimensions and profiles may be difficult to source. When requesting a match, provide a measured cross-section, photographs, and a physical sample if the supplier or mill accepts one. Do not rely on a description such as “old 6-inch cedar siding.”
Species, grade, grain, face texture, and board construction
“Cedar” is not a complete species designation. Some listings expressly identify Western red cedar, while others say only “red cedar” or “cedar.” Do not infer species from color, geography, or photographs. Ask for the stated species and supporting product or grading documentation, particularly when matching an existing wall or relying on a finish or warranty requirement.
Grade and visible character
Grade terminology varies among sellers and product lines, but it strongly influences appearance.
It can suit formal elevations, detailed historic work, and projects where consistent grain is a priority.
Select tight-knot and select-knotty products make knots and natural variation part of the design. They may suit cottages, cabins, rustic renovations, and stained walls where visible wood character is desired.
Retailers may also make performance claims about grain orientation, stability, finish retention, decay, or insect resistance. Do not treat those statements as independent proof. Results also depend on moisture condition, milling, board width, exposure, wall construction, installation, and coating compatibility.
Solid, finger-jointed, edge-glued, raw, and primed boards
Product construction affects appearance, finishing, handling, and future repair matching.
Untreated solid cedar preserves the character of individual boards. It may be preferred where a transparent or semi-transparent finish will leave grain and color variation visible. Buyers must assess usable lengths, permissible defects, moisture condition, and color variation.
Factory-primed solid cedar arrives with part of the paint preparation completed. It is not necessarily ready for a finish coat without inspection. Verify the primer type, compatible topcoats, permitted exposure before topcoating, touch-up procedures, and treatment of field-cut ends.
Finger-jointed boards combine shorter cedar blocks into longer pieces. Confirm finish suitability with samples and written product documentation before specifying a transparent coating.
Edge-glued and finger-jointed products contain multiple components. Buyers should confirm that the construction is intended for exterior siding, compatible with the chosen finish, and covered by the expected warranty. Future repairs may require matching not only the profile and texture but also the jointed construction and primer system.
Listings illustrate the breadth of the category. Examples include untreated Western red cedar in nominal 1x6, 1x8, and 1x10 widths; kiln-dried 1x8 select tight-knot plain bevel; and 1/2-by-6 CVG clapboards offered raw, primed, or finger-jointed. A retailer’s red-cedar category also shows why “red cedar” should not automatically be read as Western red cedar when the species is not expressly stated.
Another supplier describes 16-foot factory-primed products made from finger-jointed cedar blocks. Its 1/2-by-6 product uses clear vertical-grain blocks, while wider products use select-knotty blocks and edge-glued construction. Smooth and rough-sawn faces are offered, and the primer system differs by product size. These primed cedar specifications demonstrate why buyers must compare the entire construction rather than the word “primed.”
Face texture and the intended side
Cedar clapboards may have a:
- Smooth face
- Rough-sawn face
- Resawn face
- Reversible smooth and rough face
- Graded face and lower-quality back
Do not assume the smoother side is intended to face outward. One untreated product, for example, is graded for its rough face and warns that the skip-surfaced smooth back may contain imperfections. That cedar bevel listing also offers nominal 1x6, 1x8, and 1x10 options. A truly reversible product should expressly permit either face to be exposed.
Before requesting quotes, prepare one specification row for each candidate:
| Specification | What to record |
|---|---|
| Species | Exact stated species; do not infer |
| Grade | CVG, clear, select tight-knot, select-knotty, or another stated grade |
| Grain orientation | Vertical grain, flat grain, mixed, or unstated |
| Actual width | Documented or measured width, not nominal width |
| Profile thickness | Butt and tip thickness |
| Installed exposure | Approved visible course height |
| Required overlap | Product-specific minimum or range |
| Face texture | Smooth, rough-sawn, resawn, graded, or reversible |
| Construction | Solid, finger-jointed, edge-glued, or combined |
| Finish | Raw, factory-primed, prefinished, or otherwise treated |
| Lengths | Stock or random lengths, package size, and minimum order |
| Documentation | Species and grade documentation, installation instructions |
| Warranty | Scope, exclusions, finishing requirements, and installation conditions |
The best choice depends on the intended appearance and finish. CVG can suit a formal painted elevation; knotty solid cedar can suit a visibly natural wall. Finger-jointed primed material may simplify a paint-grade design with long courses, but it is not a direct visual substitute for uninterrupted solid boards under a transparent finish.
Coverage math: nominal width is not installed coverage
Clapboard estimates often fail because the advertised width is treated as if the full board remains visible. It does not: the course above conceals part of each board.
Start with six terms:
- Nominal width: A trade designation such as 1x6 or 1x8.
- Actual width: The board’s physical edge-to-edge width after milling.
- Required overlap: The portion covered by the course above.
- Installed exposure: The vertical height left visible.
- Linear foot: One foot of board measured along its length.
- Square foot: A unit of wall area measuring one foot by one foot.
Installed exposure—not nominal width—determines how much wall one linear foot covers.
Core estimating formulas
Convert the approved exposure to feet and divide the net wall area by it:
Required linear feet before waste = net wall area ÷ exposure in feet
Because 12 inches equal one foot:
Exposure in feet = exposure in inches ÷ 12
The equivalent coverage formula is:
Square feet covered by one linear foot = exposure in inches ÷ 12
Coverage benchmarks
For 100 square feet of net wall area:
| Installed exposure | Coverage per linear foot | Linear feet per 100 sq. ft. |
|---|---|---|
| 4 inches | 0.333 sq. ft. | About 300 |
| 6 inches | 0.500 sq. ft. | About 200 |
| 8 inches | 0.667 sq. ft. | About 150 |
These are arithmetic benchmarks, not installation recommendations. A supplier publishes the same estimated quantities for products with stated 4-, 6-, and 8-inch exposures, confirming that exposure drives coverage rather than the nominal width.^1
For a product with an approved 6.25-inch exposure:
- Coverage per linear foot = 6.25 ÷ 12
- Coverage per linear foot ≈ 0.521 square feet
- Linear feet for 100 square feet = 100 ÷ 0.521
- Required quantity ≈ 192 linear feet before waste
A nominal 1x8 Western red cedar plain-bevel listing gives that 6.25-inch installed face coverage. The same seller suggests approximately 5% to 10% cutting waste for straightforward walls and 15% to 25% for gable ends, depending on roof angle and layout.^2 Those percentages are planning guidance, not universal allowances.
Worked wall example
Suppose a wall is 32 feet long and 10 feet high:
- Gross wall area: 32 × 10 = 320 square feet
- Two windows at 3 × 5 feet: 2 × 15 = 30 square feet
- One door at 3 × 7 feet: 21 square feet
- Net wall area: 320 − 30 − 21 = 269 square feet
Using the documented 6.25-inch exposure above:
- Exposure in feet: 6.25 ÷ 12 ≈ 0.521 feet
- Linear feet before waste: 269 ÷ 0.521 ≈ 517 linear feet
- With a planning allowance of 10%: 517 × 1.10 ≈ 569 linear feet
Subtracting openings is appropriate for preliminary estimating, but openings still create cuts. Window heads and sills, doors, penetrations, trim returns, and short sections between openings can reduce the efficient use of long boards.
Waste can also increase because of:
- Short or mixed board lengths
- Defects that must be removed
- Unwanted visible character within the permitted grade
- Joint-stagger requirements
- Corners and trim details
- Closely spaced openings
- Gables and angled roof lines
- Course alignment around windows
- Damage during handling
- Color or grain sorting
- Minimum package quantities
Convert the final linear-foot estimate into actual boards or packages. If a seller supplies six-board packs, fixed lengths, or random-length bundles, an order cannot necessarily be placed as an exact number of linear feet. Model how available lengths fit each elevation and reserve suitable long pieces for visually important courses.
Never estimate nominal 6-, 8-, or 10-inch clapboards from the advertised width alone. Obtain the actual width, required overlap, and approved exposure for the exact product.
How to compare prices, quotes, lengths, and delivery options
The approved evidence does not support a defensible national installed-cost range for cedar clapboard siding. Retail prices are seller-, location-, product-, configuration-, and date-specific snapshots. This section therefore focuses on normalizing quotes and identifying the complete project scope.
Two linear-foot prices are comparable only after accounting for:
- Species
- Grade and grain
- Actual dimensions
- Butt and tip thickness
- Installed exposure
- Solid or jointed construction
- Raw, primed, or prefinished condition
- Face texture
- Board length
- Seller and delivery region
- Freight and unloading
- Documentation and warranty
Dated product-price snapshots are not market averages
The supplied retailer pages illustrate why prices need context:
| Listing snapshot | Displayed price | Important limitations |
|---|---|---|
| 1/2-by-6 raw CVG “red cedar” clapboard | $4.24 per linear foot | Store-specific; species stated only as red cedar; exposure not supplied |
| 1/2-by-6 primed CVG “red cedar” clapboard | $4.40 per linear foot | Store-specific; exposure and length not supplied |
| 1/2-by-8 vertical-grain Western red cedar clapboard | $4.96 per linear foot | Retailer-specific; approximate exposure of 6.5 to 7 inches |
The first two figures appeared in a Rhode Island retailer’s supplied listing, while the third appeared in a Keene, New Hampshire listing. They should not be presented as current national prices or complete installed costs. The 1/2-by-8 retailer page also labels its exposure as approximate, so a project-specific installation schedule would still be required before normalizing coverage.
Convert linear-foot pricing into installed square-foot pricing
Use:
Material cost per installed square foot before waste = price per linear foot ÷ coverage per linear foot
If a board costs $3.00 per linear foot and has 6-inch exposure:
- Coverage per linear foot = 6 ÷ 12 = 0.5 square feet
- Cost per installed square foot = $3.00 ÷ 0.5
- Material cost = $6.00 per square foot before waste
If another board costs the same $3.00 per linear foot but has 4-inch exposure:
- Coverage per linear foot = 4 ÷ 12 ≈ 0.333 square feet
- Cost per installed square foot = $3.00 ÷ 0.333
- Material cost ≈ $9.00 per square foot before waste
The linear-foot prices are identical, but the second profile requires more board length to cover the wall.
Apply waste after calculating the base quantity:
Adjusted material quantity = base linear feet × (1 + waste rate)
Then add taxes, freight, handling, finish materials, and supplier minimums.
What a complete installed quote should separate
A detailed quote should identify:
- Cedar product and quantity
- Waste allowance
- Removal of existing siding
- Disposal fees
- Allowances or unit rates for concealed repairs
- Sheathing repairs
- Weather-resistive barrier
- Window, door, roof, and penetration flashing
- Rainscreen, furring, or other drainage components
- Exterior trim and corner boards
- Cedar-compatible fasteners
- Factory and field finishing
- Cut-end treatment
- Specified sealants
- Labor
- Scaffolding or lift access
- Permits and inspections, where required
- Freight, local delivery, and unloading
- Taxes
- Warranty responsibility
Raw cedar is not automatically less expensive after field preparation and finishing are included. Factory-primed material is not automatically less expensive either. Its primer may require a particular topcoat, touch-up procedure, cut-end treatment, or completion timetable. Compare the entire coating and labor system.
Length and delivery tradeoffs
Long boards can reduce field joints and produce cleaner courses, especially on prominent elevations. They are also harder to store, carry, and maneuver. Depending on the seller and destination, long material may require local delivery, less-than-truckload freight, a flat-bed, a roll-back vehicle, or motor freight.
One retailer limits parcel-carrier shipments to boards no longer than 7 feet 10 inches and directs longer material to motor freight for an added charge.^3 That is a seller-specific shipping rule, not an industry standard.
Before choosing lengths, confirm:
- Stock and lead time
- Fixed or random lengths
- Package quantities
- Delivery vehicle type
- Road and driveway access
- Unloading responsibility
- Required equipment and crew
- Covered storage capacity
- Return restrictions
- Procedures for damaged or refused material
For every quote, record the price date, seller and region, price unit, approved exposure, total linear feet, waste allowance, taxes, freight, unloading responsibility, return policy, species documentation, grade, finish, and warranty.
Inspect material on arrival under the supplier’s acceptance terms. Check the profile and actual dimensions, wet packaging, warp, splits, damaged ends, face defects, inconsistent texture, broken joints, damaged primer, and mixed products. Photograph concerns before installation and do not assume cut or installed boards can be returned.
The wall system behind durable cedar clapboards
Cedar is the outer cladding, not the wall’s only water-control layer. Overlapping boards alone do not create a complete weather-resistant assembly.
A robust wall coordinates three functions:
- A properly lapped weather-resistive barrier
- Integrated flashing that directs water outward at interruptions
- A drainage path through which incidental water can move downward and exit
Many wood-siding guides favor a ventilated rainscreen or furred cavity to improve drainage and drying. There is no universal cavity depth, furring spacing, or ventilation arrangement for every cedar wall. The correct design depends on climate, sheathing, exterior insulation, framing, profile, structural fastening path, code, wind exposure, insect control, and product requirements.
Flashing deserves particular attention at:
- Window and door heads, jambs, and sills
- Roof-to-wall intersections
- Deck and porch ledgers
- Pipes, vents, lights, and hose connections
- Horizontal material transitions
- Water tables and skirt boards
- Changes in wall direction
- Attached decks, balconies, and structures
Flashing must be integrated with the drainage plane so water moves outward. Caulk cannot replace flashing, and sealant should not block the lower edge of flashing or another intended drainage exit.
Sealant also should not automatically be placed inside clapboard laps. Closing laps can interfere with drainage and drying. Use sealant only where the approved wall and product details call for it.
Clearances are assembly-specific
One cedar supplier guide calls for at least 2 inches between siding or trim and roofs or decks, and at least 6 inches above grade at water-table or skirt trim. It also directs installers to leave flashing exits uncaulked and to treat end cuts.^4
Those dimensions are examples from one guide, not universal permissions. Other proprietary wood-cladding systems specify different ground clearances. The controlling requirements are the applicable code, approved wall assembly, current product instructions, and warranty, considered alongside snow accumulation, splashback, roof drainage, and site exposure.
End grain and field cuts need deliberate treatment under the selected finish system. Confirm requirements for:
- Cut board ends
- Penetrations
- Butt or scarf joints
- Corners
- Material transitions
- Damaged factory primer
- Trim interfaces
Available guidance conflicts over whether some joints should be tight, slightly gapped, bedded in sealant, or left unsealed. Those differences may reflect profile, board construction, moisture condition, climate, and wall design. Resolve the joint detail before installation rather than selecting whichever approach is easiest on site.
Use this decision hierarchy:
- Applicable code and the approved wall assembly
- Current product instructions and warranty requirements
- Profile-specific industry guidance
- Retailer or contractor preferences
Project-specific professional review is prudent when the assembly is unusual or the property is exposed to persistent wetting, salt air, high winds, wildfire requirements, or preservation restrictions. Those conditions can change the permitted cladding, structural fastening, corrosion protection, flashing, and ventilation details.
Overlap, fastening, joints, and course layout
Clapboard installation generally begins by planning course locations, completing the wall’s water-control layers, and installing from the bottom upward. A starter or furring strip behind the first course establishes the angle that later boards develop through overlap.
A story pole records course positions vertically. A swing stick distributes small exposure adjustments over several courses so clapboard edges align with window sills, heads, doors, and other features. Advance layout helps avoid narrow slivers above openings or visibly misaligned courses across a façade.
Overlap and exposure
Multiple sources give approximately 1 inch as a general minimum overlap for bevel siding, but nominally similar boards can have different approved exposures. Industry guidance gives a 1-inch overlap for nominal 6-inch siding, while other installation examples describe 4- or 4.5-inch exposure on certain 6-inch clapboards. Reducing the recommended overlap can increase vulnerability to wind-driven water.^5
The difference is not necessarily a contradiction. “Nominal 6-inch” can describe boards with different actual widths, tapers, moisture conditions, and product schedules.
Use this sequence:
- Identify the exact product and profile.
- Obtain its current exposure and overlap schedule.
- Confirm the permitted substrate and wall assembly.
- Lay out courses around openings.
- Calculate coverage from the approved exposure.
Do not increase exposure merely to reduce the material order.
Fastening principles
A broadly recurring approach for plain bevel siding is to:
- Face-nail into studs or approved solid backing
- Use the number of fasteners required by the product schedule
- Place fasteners just above, rather than through, the overlap when specified
- Keep the required distance from ends and edges
- Avoid overdriving
- Achieve the specified penetration into sound backing
Several cedar guides call for at least 1.25 inches of penetration into solid wood, but that does not establish one universal nail length. Required length depends on siding thickness, sheathing, furring, exterior insulation, and the location of the approved structural fastening path.^6
Stainless steel is the most consistently recommended fastener material in the supplied cedar guidance. Some systems also permit hot-dipped galvanized or aluminum nails. Electroplated, ordinary iron, and copper fasteners can create corrosion, deterioration, or staining concerns in contact with cedar. The product and assembly documents must still establish alloy, shank, gauge, head, spacing, edge distance, and pattern.
A fastener should secure the board without crushing the surface or preventing intended movement. Overdriven heads can damage the wood and create depressions; underdriven heads can keep courses from seating properly. Pneumatic equipment should be adjusted and tested on the actual project material.
Field joints
Butt or scarf joints are commonly staggered between courses and placed over studs, blocking, or approved furring. Guidance differs on whether joints should be square or angled, tight or slightly gapped, sealed or left open, and flashed individually.
Resolve those details before production cutting. Whatever detail is selected must preserve the drainage strategy rather than treating caulk as the primary defense.
Stop-work checklist
Do not begin installation merely because the boards and crew have arrived. Stop until the contractor has:
- The exact product identification
- Current installation instructions
- Approved exposure and overlap
- Fastening schedule
- Permitted fastener material and dimensions
- Substrate and backing requirements
- Weather-resistive barrier details
- Window, door, roof, and penetration flashing details
- Drainage or rainscreen requirements
- Moisture and acclimation requirements
- Finish and cut-end instructions
- Joint and sealant details
- Required clearances
- Applicable code provisions
- Warranty conditions
Where these documents conflict with generic articles or retailer advice, the approved assembly, applicable code, and product requirements take priority.
Finishing, inspection, maintenance, and common failure modes
Real cedar clapboard siding requires recurring maintenance. Its finish and detailing must be inspected, cleaned, repaired, and renewed as conditions require. It should not be selected on the assumption that installation ends the owner’s involvement.
Broad finish categories include:
- Raw or unfinished: Leaves weathering less controlled and may not satisfy product or project requirements.
- Paint: Creates an opaque film and uniform color.
- Solid-color stain: Obscures much of the color variation while retaining some surface character.
- Semi-transparent stain: Leaves more grain and board variation visible.
- Factory primer: Prepares the siding for a compatible field-applied system; it is not necessarily the final finish.
There is no universal best finish. The decision depends on desired appearance, texture, product construction, preparation, climate, solar exposure, and willingness to maintain the coating.
Sources also disagree about coating every face. Some supplier and contractor instructions call for finishing all six sides before installation. Other contractor guidance recommends coating only the exterior face. Neither should be converted into a universal rule. Follow a written system compatible with both the siding product and the coating. Cut ends commonly require primer or stain under the applicable instructions.
Handling before installation
Before fastening, boards should generally be:
- Stored flat
- Kept off the ground
- Protected from rain and direct wetting
- Ventilated rather than sealed in trapped moisture
- Unbundled or stickered when directed
- Acclimated according to product instructions
- Inspected for damage and unacceptable defects
Do not borrow an acclimation timetable from an unrelated wood product. Some systems specify a period; others rely on a target moisture condition or supplier direction. Wetting boards and then enclosing them in the wall can contribute to movement and coating problems.
Annual condition checks
Include cedar siding in an annual exterior review and inspect it after significant weather events. Look for:
- Peeling, blistering, fading, or worn finish
- Open joints
- Cracked, detached, or failed sealant
- Black streaks at fasteners
- Cupping or warping
- Checks and splits
- Soft or discolored wood
- Insect activity
- Damaged board ends
- Blocked rainscreen or flashing exits
- Debris at roof and deck clearances
- Failed or bent flashing
- Repeated splashback
- Overflowing gutters or concentrated runoff
- Sprinklers wetting the wall
- Vegetation restricting drying
One documented cleaning approach uses mild detergent, a soft-bristled brush, and a garden-hose rinse. The same clapboard maintenance guidance recommends checking for cracks, splits, warping, insects, rot, and failed sealant.
Pressure washing should not be presented as universally safe. One proprietary wood-cladding guide expressly advises against pressure washing and recommends condition-based finish renewal.^7 Obtain cleaning instructions compatible with the actual siding and coating system before using stronger methods.
Refinishing intervals are not promises
Supplied recommendations range from approximately 3 to 10 years, depending on the coating, preparation, climate, ultraviolet exposure, wall orientation, and observed condition. One retailer gives a 3-to-5-year range for many exterior finishes, while a general clapboard guide gives a 5-to-10-year repainting or restaining range. These are source-specific recommendations, not a universal calendar.
Use a condition-based approach. Inspect regularly and renew the coating before it loses the protection required by the selected system. South- and west-facing elevations may weather differently from shaded walls, while persistently damp areas may fail for reasons that another coat cannot correct.
Visible symptoms suggest questions, not certain diagnoses:
- Black fastener streaks can indicate corrosion or an incompatible fastener.
- Peeling paint can involve poor preparation, incompatible coatings, moisture, or delayed maintenance.
- Cupping and checking can involve changing moisture conditions, restricted movement, or faulty detailing.
- Splits can involve fastener placement, overdriving, defects, or movement.
- Soft wood or decay can indicate persistent wetting, trapped water, failed flashing, inadequate clearance, or neglected finish.
Investigate and correct the moisture source before applying another finish.
Is cedar the right siding for this house?
Cedar is neither universally superior nor automatically impractical. It is a strong candidate when authentic wood appearance and individual-board repair align with the owner’s priorities—and when the project can support correct installation and recurring care.
Its defensible advantages include:
- Real wood grain and board-to-board variation
- Paintable and stainable surfaces
- Clear, knotty, smooth, rough, and resawn options
- Traditional shadow lines
- Compatibility with many historic architectural styles
- The potential to replace an individual damaged board
Those benefits must be weighed against:
- Recurring inspection and refinishing
- Sensitivity to persistent moisture and poor drainage
- The need for compatible fasteners
- Freight, handling, and storage complexity
- Variation in board character and defects
- Difficulty matching discontinued profiles
- Greater consequences when flashing, clearances, or finish care are neglected
Fiber cement, vinyl, engineered wood, and metal should be compared using the same project boundary. A fair comparison includes removal, disposal, concealed repairs, weather-resistive barrier, flashing, drainage, trim, labor, finishing, freight, maintenance, and expected repair methods—not merely the cladding’s shelf price.
Climate changes the specification without proving that one siding material always wins. Persistent rain and humidity increase the importance of drainage and drying. Strong ultraviolet exposure affects coating selection and maintenance. Freeze-thaw exposure, hail, coastal salt, snow accumulation, and wildfire requirements may alter detailing or material eligibility. Obtain project-specific requirements rather than relying on generic material rankings.
Also treat cedar-versus-fiber-cement comparisons cautiously when they come from manufacturers or preferred contractors. Their cost, lifespan, maintenance, and fire-performance claims may apply to particular products, climates, or commercial interests. Compare current technical documentation and equivalent quote scopes.
Historic properties add another review step. Local requirements may affect material, texture, paint, course exposure, and treatment of trim or architectural details. Because those rules vary by jurisdiction and property designation, consult the responsible local preservation and permitting authorities before ordering material or removing existing siding.
Cedar is a stronger candidate when:
- Authentic wood is a primary design goal.
- The owner accepts recurring inspection and refinishing.
- A qualified wood-siding installer is available.
- The wall can be detailed for drainage and drying.
- Compatible fasteners and finishes are available.
- Delivery and covered storage can be managed.
- Individual-board repair is valuable.
- Applicable preservation requirements favor real wood.
Alternatives deserve closer consideration when:
- Minimal recurring upkeep is the dominant priority.
- The owner cannot reliably maintain the finish.
- Fire or project requirements limit combustible cladding.
- Safe access for inspection and refinishing is unusually difficult.
- Suitable installers or replacement profiles are unavailable.
- The desired appearance does not depend on authentic wood.
For a broader review, Siding Spot compares wood, vinyl, fiber cement, metal, and engineered wood siding by cost, lifespan, maintenance, and failure mode. Apply the same installation and maintenance assumptions to each option.
The practical buying sequence is:
- Identify the exact clapboard or bevel profile.
- Verify the stated species, grade, grain, texture, and construction.
- Obtain actual dimensions, approved exposure, and current product documents.
- Calculate coverage from exposure—not nominal width.
- Add waste based on the actual elevations and available board lengths.
- Convert quotes to material cost per installed square foot.
- Confirm freight, unloading, storage, and return requirements.
- Confirm the complete compatible finish system and cut-end treatment.
- Review the weather-resistive barrier, flashing, drainage, fastening, and clearances.
- Budget for recurring inspection and refinishing.
Cedar is best treated as a premium real-wood choice whose appearance and repairability come with recurring maintenance and little tolerance for shortcuts.
Cedar clapboard siding FAQs
Is cedar bevel siding the same as cedar clapboard siding?
Usually—when “bevel siding” means the traditional tapered board installed horizontally in overlapping courses. Cedar clapboards are commonly sold as cedar bevel siding.
The terms should not be used for every horizontal cedar profile. Rabbeted bevel, shiplap, channel, Dutch lap, and tongue-and-groove products have different edge shapes, movement provisions, fastening details, and coverage. Confirm the cross-section before estimating or repairing a wall.
How many linear feet of cedar clapboard cover 100 square feet?
The quantity depends on approved installed exposure:
- At 4 inches: about 300 linear feet
- At 6 inches: about 200 linear feet
- At 8 inches: about 150 linear feet
- At 6.25 inches: about 192 linear feet
The first three figures correspond to supplier-published exposure and coverage examples; the 6.25-inch figure is calculated from a documented plain-bevel exposure.^8
Use:
100 square feet ÷ exposure in feet = linear feet required before waste
Then add waste for cuts, defects, board lengths, gables, corners, openings, and course layout.
How much should cedar clapboards overlap?
There is no universal dimension. Multiple supplied guides give approximately 1 inch as a general minimum, while another contractor source recommends 1.25 inches and other examples produce still larger overlaps on certain 6-inch boards.^9
Use the exact product’s profile schedule, approved assembly, warranty requirements, and applicable code. Do not reduce the specified overlap to stretch coverage.
What nails should be used for cedar clapboard siding?
Stainless-steel siding nails are the most consistently recommended choice in the supplied guidance. Some products also permit hot-dipped galvanized or aluminum fasteners. Electroplated, ordinary iron, and copper fasteners can raise corrosion or staining concerns.
The alloy is only part of the specification. Confirm nail length, shank, gauge, head, spacing, edge distance, placement, and required penetration. Several guides call for at least 1.25 inches of penetration into solid backing, but exact fastener dimensions remain assembly-specific.^10
Does cedar clapboard siding need to be primed or stained on all sides?
There is no single rule for every cedar product and coating system. Some suppliers and contractors require six-sided finishing; other guidance recommends treating only the exposed face. Factory-primed products may be coated on all sides but still require field touch-up, timely topcoating, and treatment of cut ends.
Follow the written requirements of both the siding product and coating manufacturer. Confirm compatibility, surface preparation, permissible moisture condition, cut-end treatment, damaged-primer repair, and the deadline for applying finish coats. Do not choose between six-sided and face-only finishing from generic advice when the approved product system specifies the method.